Going online! Hosting Your Static Website on Amazon S3
Published on: August 15, 2025
Welcome back to the "Portfolio from Scratch" series! So far, we've navigated the exciting world of domain registration, set up our local development lab, and successfully pointed our domain to AWS using Route 53. Our digital address is registered, and the signpost is pointing to the right place.
But what happens when someone follows that signpost? Right now, they arrive at an empty lot.
In this article, we're going to build on that lot. We'll take the simple website files we created on our computer and make them live for the whole world to see using Amazon S3. Let's get building!
Our Digital Plot of Land
Let's think of the internet as a giant, sprawling city.
- Our Domain Name (
yourpersonaldomain.com): This isn't just the address; it's the memorable name of our house, like the "Taj Mahal" or "Antilia." People know these famous buildings by name, but almost no one knows their specific plot number or street address. Our domain is that famous, memorable name. - Route 53 (DNS): This is the city's planning office and postal service. It's the official directory that knows "Antilia" is located at Plot #123, and it directs all mail and visitors there.
- Amazon S3: This is our actual plot of land (Plot #123). It's where we will store the materials (our files) and build our house (our website).
Amazon S3 (Simple Storage Service) is, at its core, a place to store files. It's incredibly durable and scalable, like having a plot of land that can hold anything from a tiny shed to a massive skyscraper. Today, we'll use it to build our first simple house.
Step 1: Creating Our S3 "Bucket"
In S3, we don't store files in folders; we store them in "buckets." A bucket is just a container for our files. Let's create one.
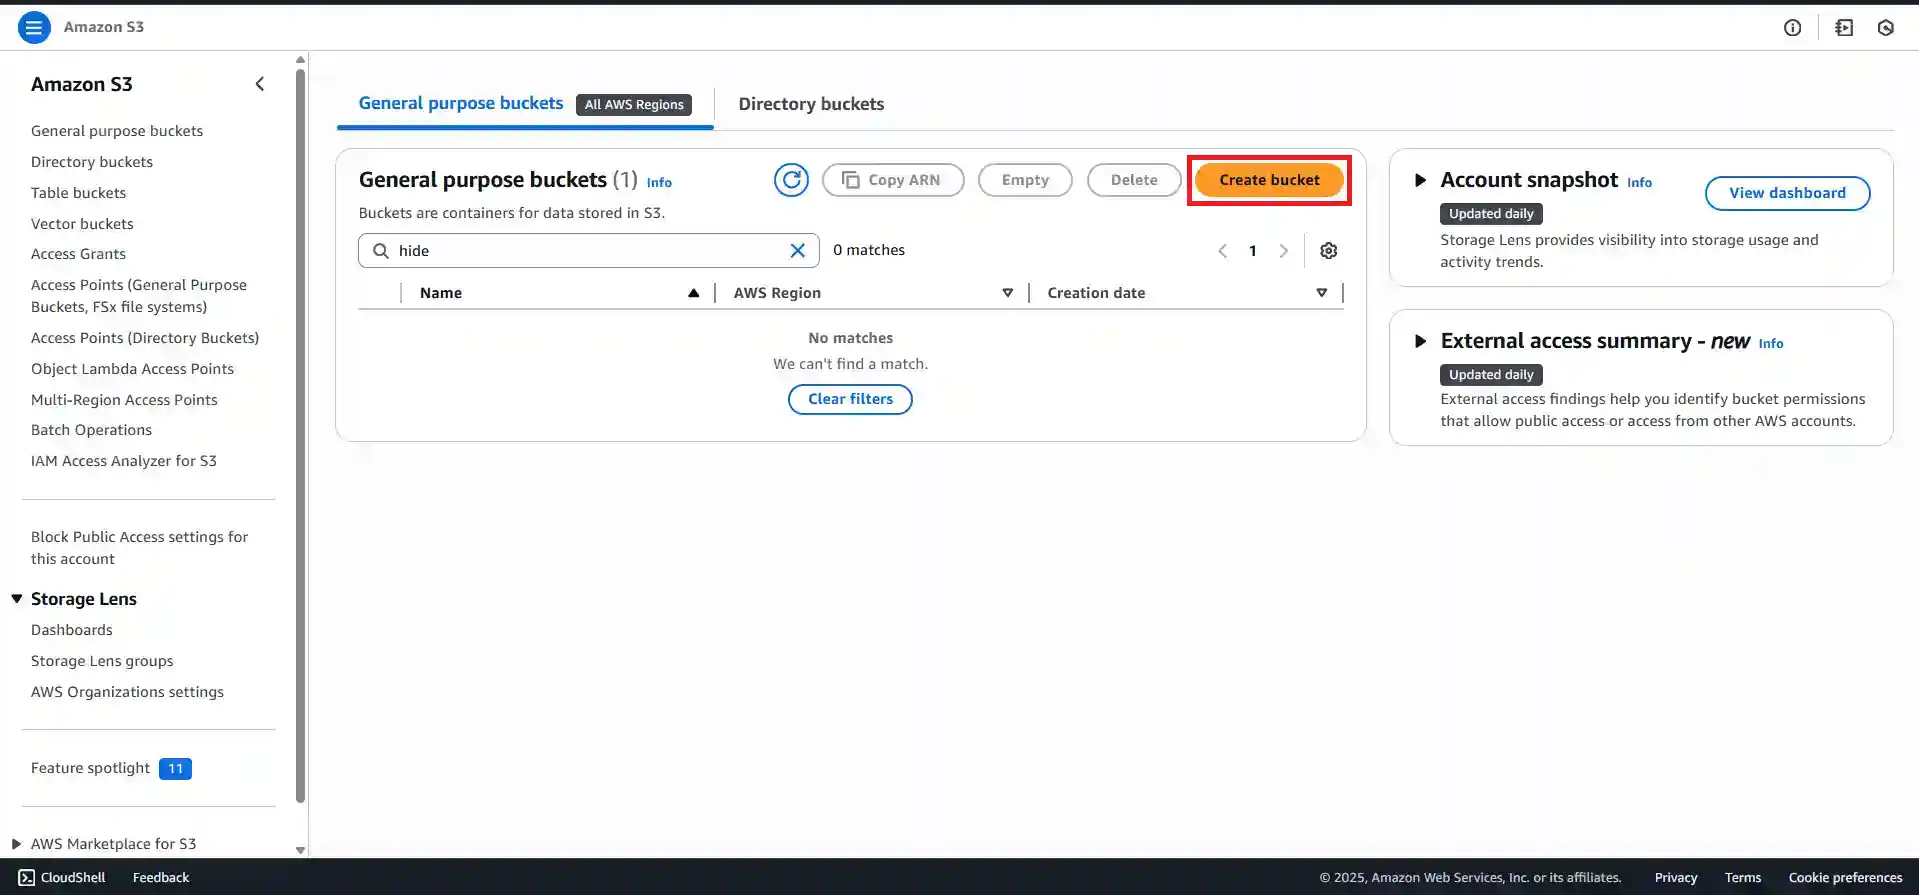
- Navigate to S3: Log in to the AWS Console and use the search bar at the top to find and navigate to the S3 service.
- Create Bucket: Click the big orange "Create bucket" button.
- Configure Our Bucket:
- Bucket name: While not strictly compulsory for all setups, it is a strong best practice and a requirement for certain AWS features that our bucket name exactly matches the domain name we intend to use. Following this convention now will make the next steps in this series much smoother. Therefore, we should name our bucket to match our domain, including the subdomain. For example, if our domain is
ashaytaksande.com, we should name our bucketwww.ashaytaksande.com. - AWS Region: Choose a region that is geographically close to us or our target audience. This helps our site load a little faster.
- Block Public Access settings: For now, let's leave the "Block all public access" box checked. We'll handle permissions in a more secure and specific way in a moment. Security first!
- Bucket name: While not strictly compulsory for all setups, it is a strong best practice and a requirement for certain AWS features that our bucket name exactly matches the domain name we intend to use. Following this convention now will make the next steps in this series much smoother. Therefore, we should name our bucket to match our domain, including the subdomain. For example, if our domain is
- Click "Create bucket" at the bottom. Congratulations, we now own a digital plot of land!
Step 2: Enabling Static Website Hosting
By default, an S3 bucket is just for private storage. We need to tell it, "Hey, I want you to act like a web server."
- Click on the name of the bucket we just created to enter its dashboard.
- Go to the Properties tab.
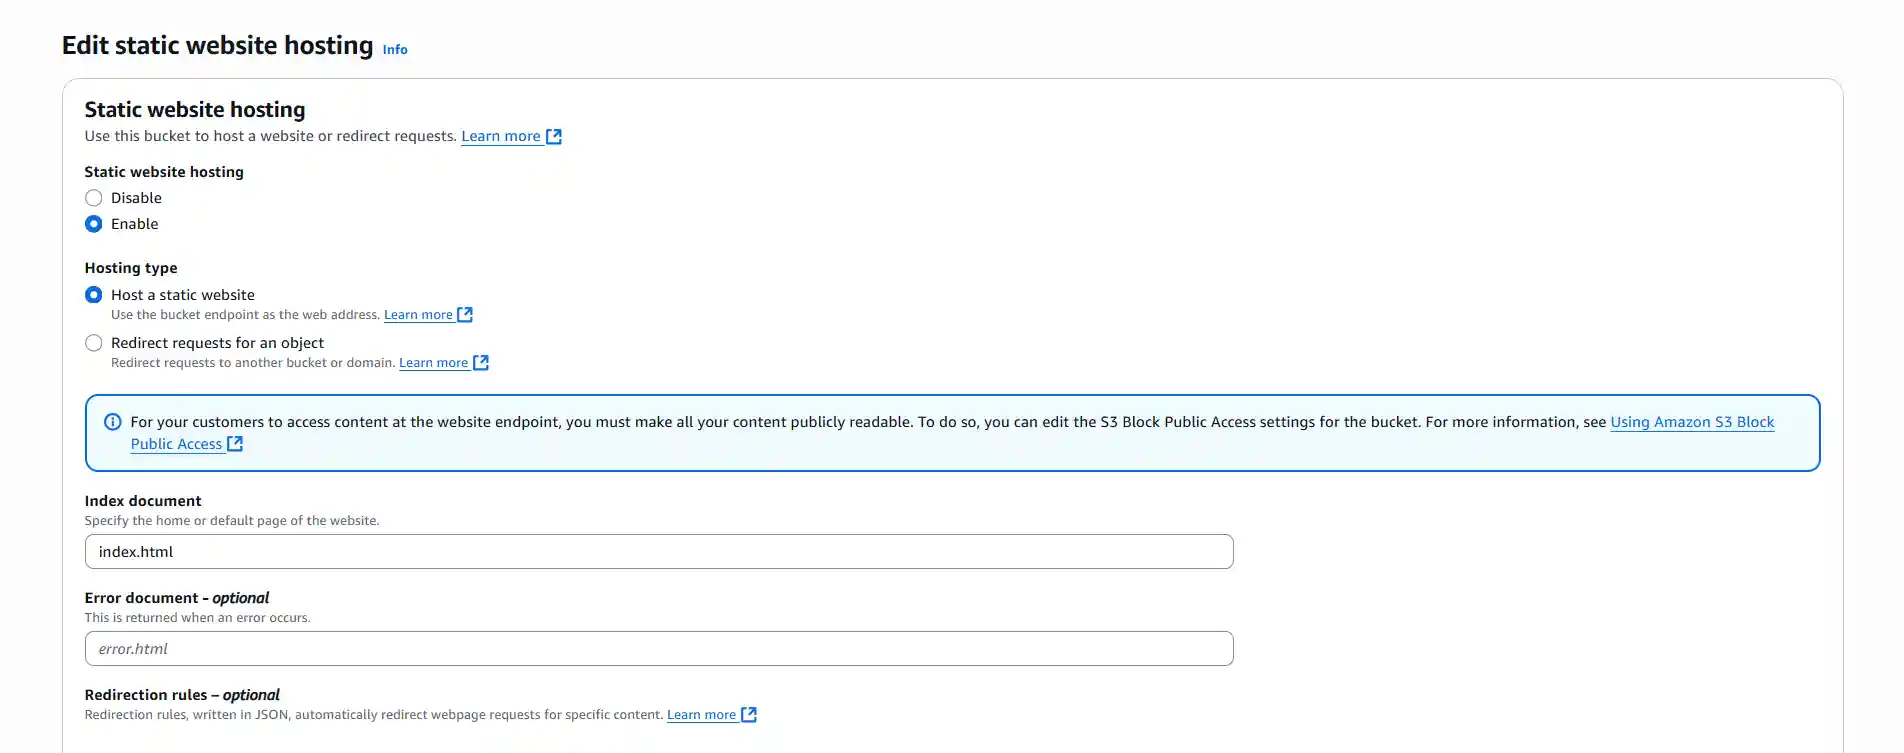
- Scroll all the way to the bottom until we see the "Static website hosting" card. Click "Edit".
- Select "Enable" for Static website hosting.
- In the Index document field, type
index.html. This is the file S3 will show when someone visits our main address. - Click "Save changes".
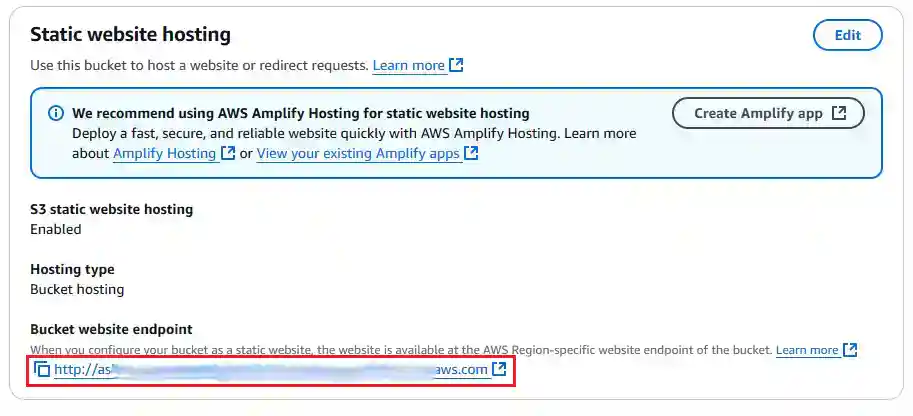
If we scroll down to the "Static website hosting" card again, we'll now see a Bucket website endpoint. This is the public URL for our S3 website. Let's not click it just yet, it won't work until we set permissions.
Step 3: Uploading Our Website Files
Now it's time to move our house onto the plot. Let's upload the files we created in Article 2.
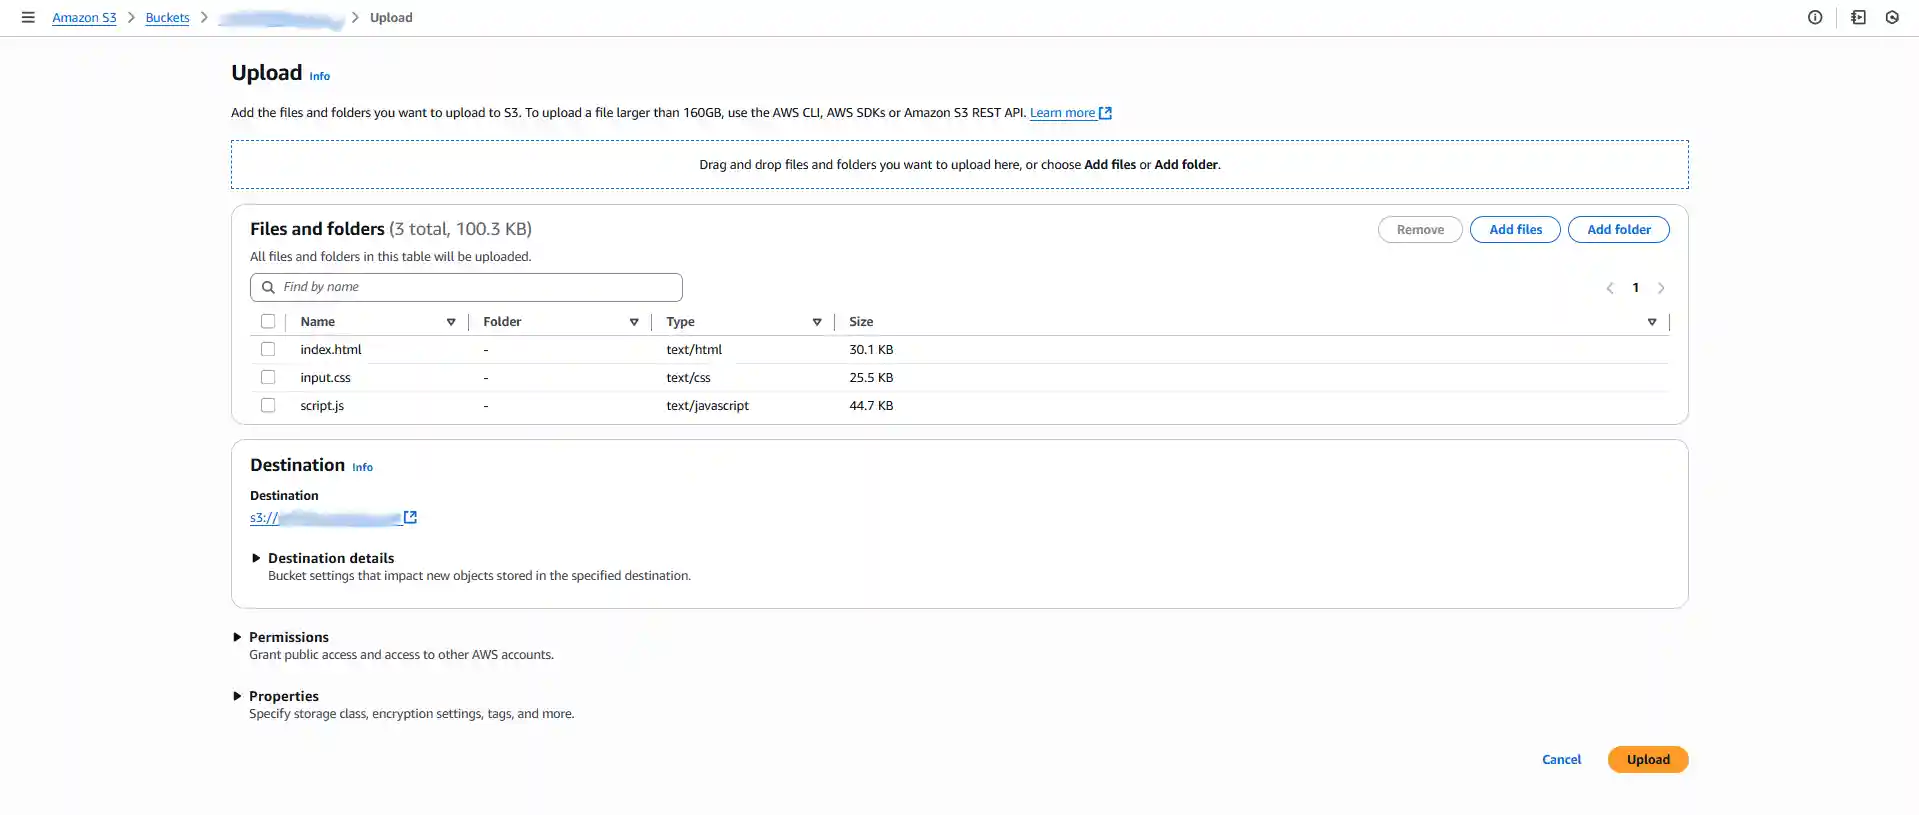
- Click on the Objects tab of our bucket.
- Click the "Upload" button.
- We can either drag and drop our
index.html,style.css, andscript.jsfiles into the window or click "Add files" to select them. - Once they are listed, click "Upload" at the bottom.
Our building materials are now on site! But they are locked behind a gate. Let's open that gate to visitors.
Step 4: Setting the Right Permissions
This is the most critical step for making our website public. We need to create a "Bucket Policy," which is a set of rules that tells S3 who is allowed to see our files.
- Go to the Permissions tab of our bucket.
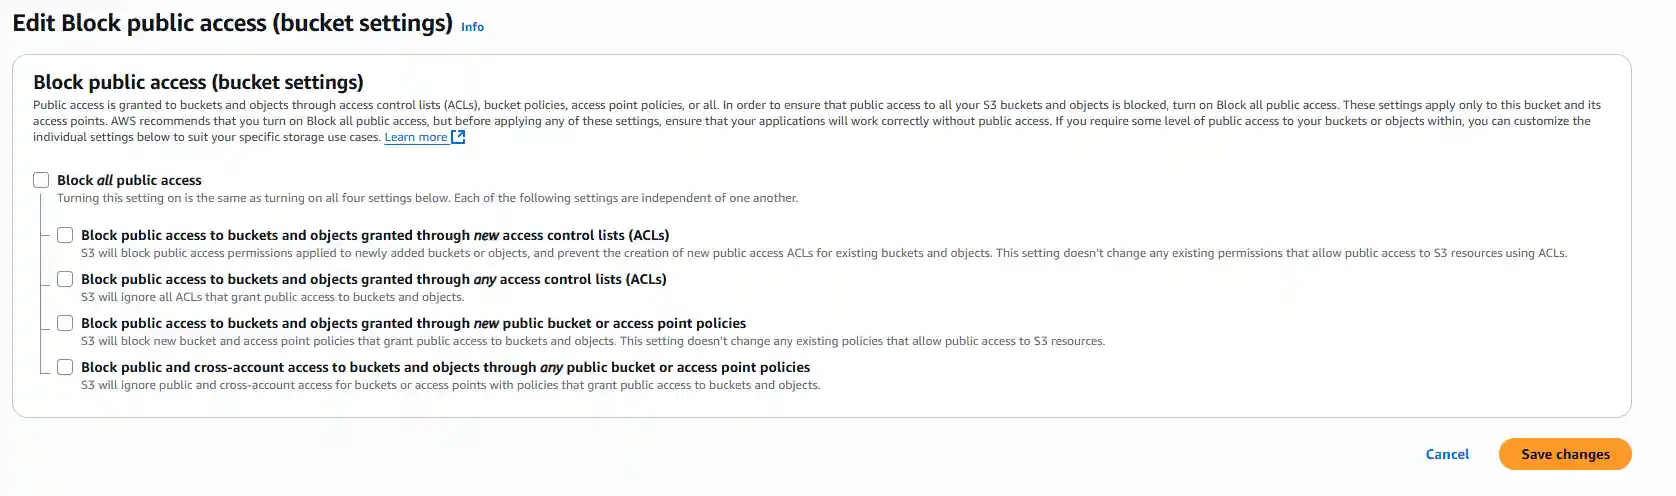
- First, under the "Block public access (bucket settings)" section, click "Edit".
- Uncheck the box for "Block all public access" and click "Save changes". AWS will ask us to confirm this by typing
confirm. This allows us to create a more specific public access rule. - Next, scroll down to the "Bucket policy" section and click "Edit".
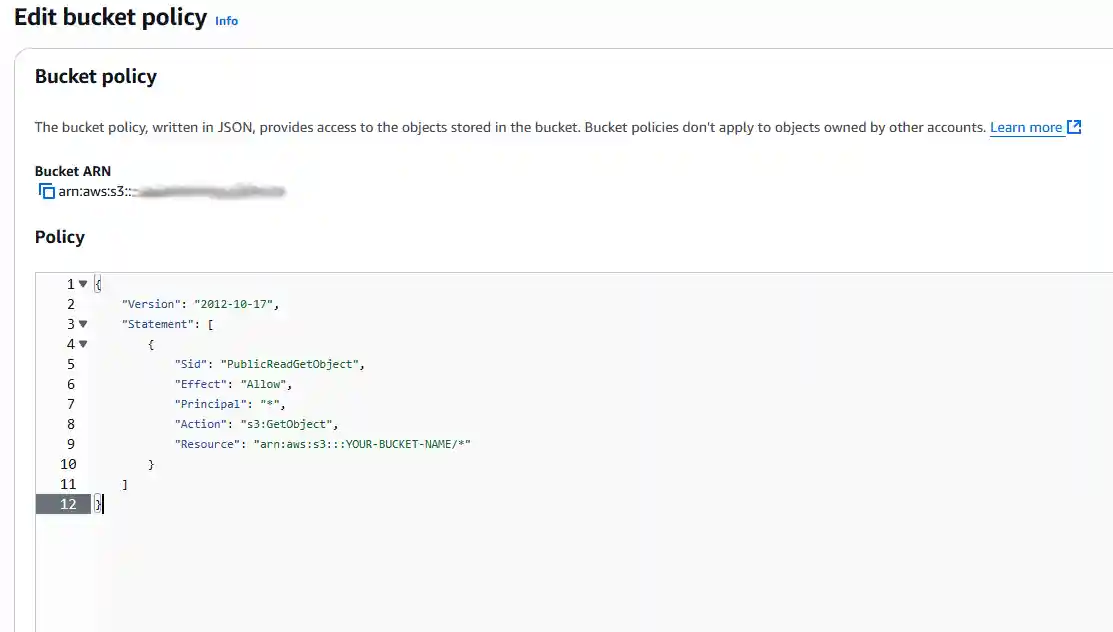
- This will open a JSON policy editor. It looks intimidating, but don't worry! Copy the policy below and paste it into the editor.
{ "Version": "2012-10-17", "Statement": [ { "Sid": "PublicReadGetObject", "Effect": "Allow", "Principal": "*", "Action": "s3:GetObject", "Resource": "arn:aws:s3:::YOUR-BUCKET-NAME/*" } ] }IMPORTANT: Replace
YOUR-BUCKET-NAMEwith our actual bucket name (e.g.,www.ashaytaksande.com).Breaking Down the Policy
Let's quickly break down what this JSON policy means. Think of it as a single rule we're giving to a security guard.
"Version": This just specifies the version of the policy language itself. We'll almost always use"2012-10-17"."Statement": A policy is made up of one or more statements (rules). Ours only has one."Effect": "Allow": This is the core of the rule. It says this rule will allow access."Principal": "*": The Principal is who the rule applies to. The asterisk (*) is a wildcard that means everyone on the internet."Action": "s3:GetObject": This is what everyone is allowed to do. Specifically, they are allowed to "get" (or read) objects from S3."Resource": "arn:aws:s3:::YOUR-BUCKET-NAME/*": This is what the rule applies to. It's an ARN (Amazon Resource Name) that points to all objects (/*) inside our specific bucket.
So, in plain English, the rule tells AWS: "Allow everyone on the internet to read any file inside this specific bucket."
- Click "Save changes". We should now see a red "Publicly accessible" tag under our bucket's name.
The Moment of Truth! 🚀
Navigate back to the Properties tab, scroll down to "Static website hosting", and click on the Bucket website endpoint URL.
We should see our index.html page live on the internet!
We've done it! We've taken files from our local computer and hosted them on a globally accessible, highly durable server. This is a massive step.
However, it's important to remember that this long S3 endpoint URL is not the final address for our website. Let's think of it as a temporary access road to check on our construction site.
In the upcoming articles, we'll make our site truly professional. We will first secure it with that all-important green padlock (HTTPS) using a free certificate from AWS Certificate Manager (ACM). Then, we will configure it to work with our personal domain name, so visitors can finally reach our site by typing www.yourpersonaldomain.com.
Get ready to take our portfolio to the next level! See you in the next article.
This article is part of the series: Building a Portfolio Website From Scratch
About the Author
This article was written by Ashay Taksande.