Lab Setup for WebPage Creation and Local Testing
Published on: July 1, 2025
Alright, so you’ve got your domain name. Awesome! That little piece of the internet is now yours, and it’s the address for your future online home. If you followed along in Part 1: Your Digital Identity, you not only picked a great name but also locked it down like Fort Knox. High five for that🖐️.
Now comes the fun part. Before we can build the house, we need to set up our workshop and gather our tools. Don't worry, you won't need to spend a dime. We’re going to assemble a professional-grade "WebPage creation" and "testing" laboratory using the powerful resources that major companies use, all for free.. Ready to get your hands a little dirty? Let's do this.
Your Slice of the Cloud with AWS
We need a place to host our website, and we’re going straight to the top: Amazon Web Services (AWS). This is the engine that will power your portfolio. It might sound intimidating, but we’re just going to use a tiny, free corner of it.
So, what's the catch with "free"?
Let's be real. Companies don't give things away for nothing. The AWS Free Tier is designed to let you learn and build without getting a bill. For a small portfolio site like ours, the amount of traffic and storage they give you for free in the first year is more than enough. But you still need to put a credit card on file for verification and, in the unlikely event you suddenly become an internet sensation overnight and get millions of visitors.
To make sure that never happens by accident, we're going to set up a safety net.
Your Step-by-Step Guide to Getting on AWS:
- Head over to the sign-up page: Open up your browser and go to aws.amazon.com/free/.
- Create Your Account: Hit that "Create a Free Account" button. You’ll enter your email and pick an account name (your name is fine).
- Set a Strong Password: This first user you're creating is the "root user," meaning it has the keys to the entire kingdom. So, use a strong, unique password and save it somewhere safe like a password manager.
- Fill in Your Details: Pop in your contact info. Choose "Personal" for the account type.
- Enter Your Card Info: This is the verification step. You might see a tiny temporary charge of around ₹2, which they'll refund.
- Prove You're Human: They'll text or call you with a code to make sure you're you.
- Pick Your Plan: You'll be offered a few support plans. Stick with the "Basic support - Free" plan. It’s all we need.
- You're In! Once you’re done, you’ll be able to log into the AWS Management Console. Go ahead and bookmark that page.
Hold On! Two Super Important Security Steps
Before you click on anything else, we need to secure your new account. This will take five minutes, but it will save you a world of potential headaches.
-
Add a Deadbolt with Multi-Factor Authentication (MFA): Just like the 2FA on your domain, this adds a second layer of security.
- In the AWS search bar at the top, type
IAMand hit Enter. - You should see MFA in the checklist at the top and at the right hand side in the quick links, a warning that says "Add MFA for root user." Click it.
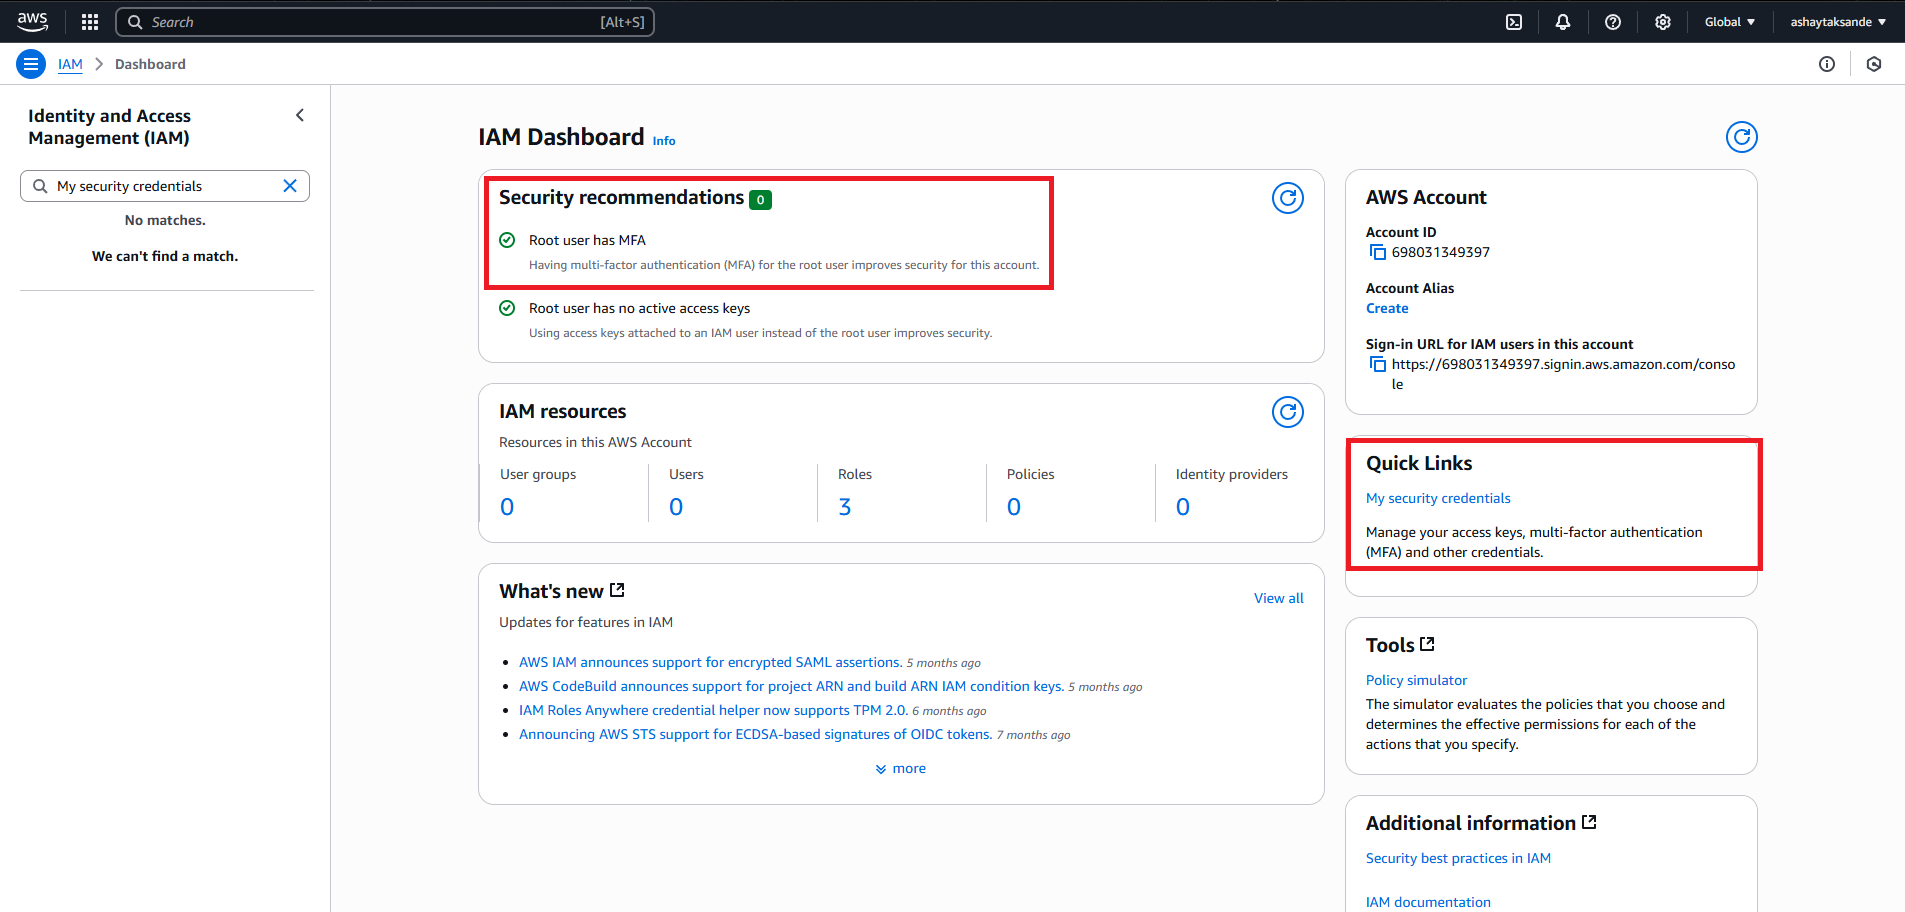
Multifactor authentication (MFA) - Follow the steps. You’ll need an authenticator app on your phone (like Google Authenticator or Authy). Scan the QR code, AWS will get added to your authenticator app, enter the 6 digit code in the fields one by one, enter the current code in the first field, wait for the current code to expire and the new code to appear, enter the new code in the second field, press on "Assign MFA". Your account is now a fortress.
- In the AWS search bar at the top, type
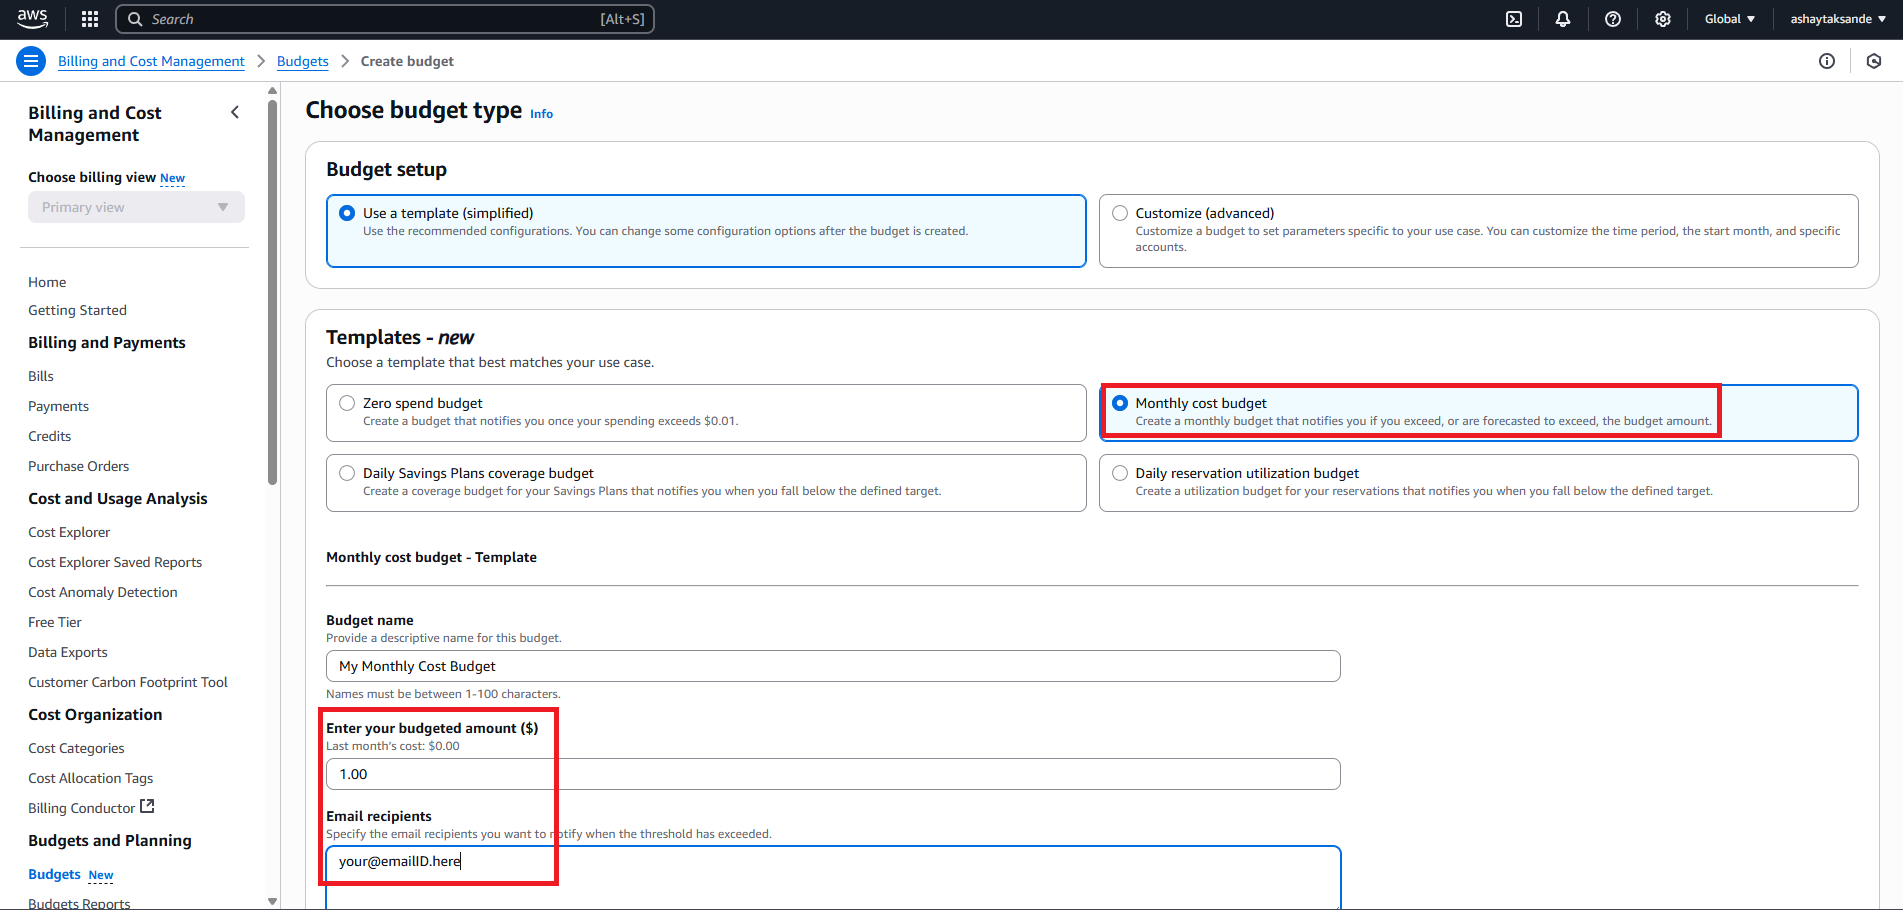
Set a $1 Spending Alarm: This is our safety net. We’ll tell AWS to email us if our bill ever looks like it’s going to be more than a few cents.
1. Click your account name in the top-right corner and go to the "Billing Dashboard." 2. Find "Budgets" on the left-hand menu. 3. Create a new budget. There's a simple template for a "Monthly cost budget", set the budget to $1. Set it up to email you if your costs are forecasted to go above a dollar. Now you can relax, you will get an email on your entered email if the charges ever go above the entered budget ammount.
Next: Meet Your AI Code-Writing Buddy, Gemini
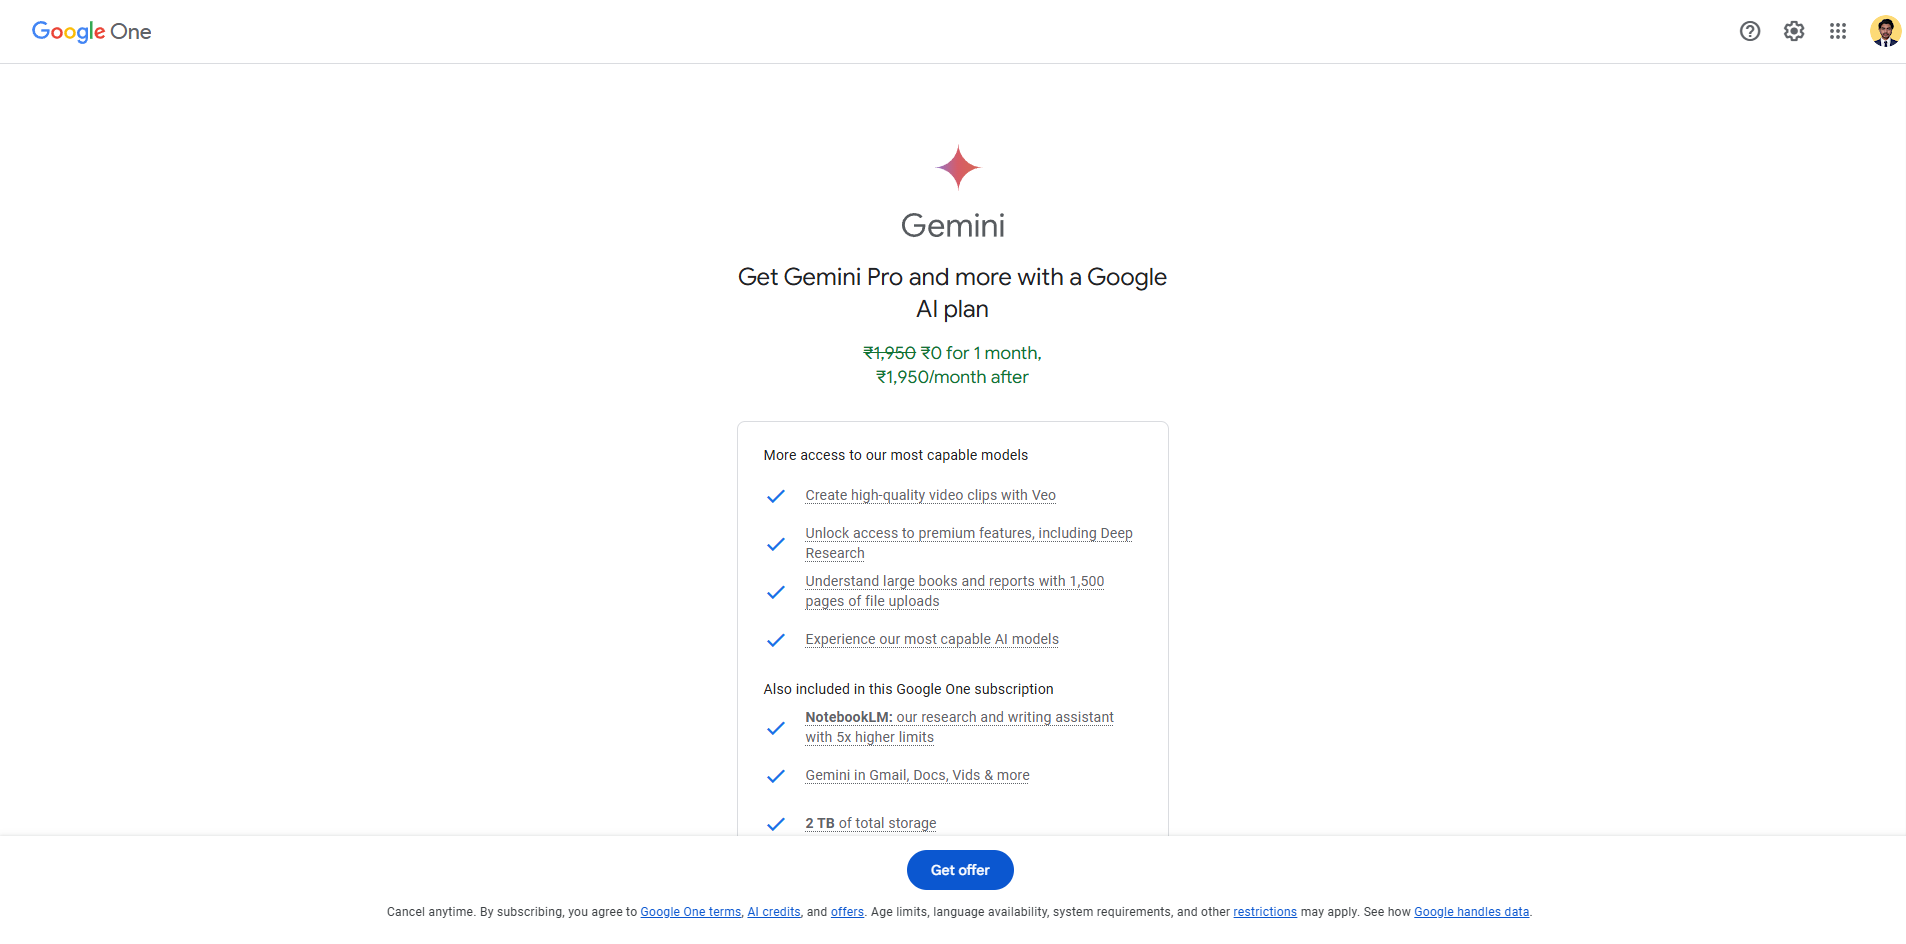
We're not going to write the code for our website from scratch. Instead, we're going to direct an AI to do it for us. Our creative partner for this is Google Gemini.
Getting Started with Gemini:
-
Head to the website: Go to gemini.google.com.
-
Sign in with your Google account.
-
Free Gemini Pro, sign up for the free trial, cancel before one month is complete if you don't want to continue to prevent getting charged.
-
That's literally it. You’ll see a chat window. This is where the magic will happen later. For now, just know that your AI assistant is ready and waiting for your instructions.
Gemini
Finally: Your Local Workshop for Building and Testing
Okay, last step. We need a place on our own computer to assemble the code and see what our website looks like before we show it to the rest of the world. Think of this as your private test lab.
Step 1: Install the Core Tools
-
Visual Studio Code (VS Code): This is the undisputed champion of code editors. It’s free, it’s powerful, and it’s what most developers use.
- Go to code.visualstudio.com and download it.
- Run the installer. On the "Select Additional Tasks" screen, do yourself a favor and check the boxes for "Add 'Open with Code' action." This adds a super handy shortcut when you right-click on a folder.
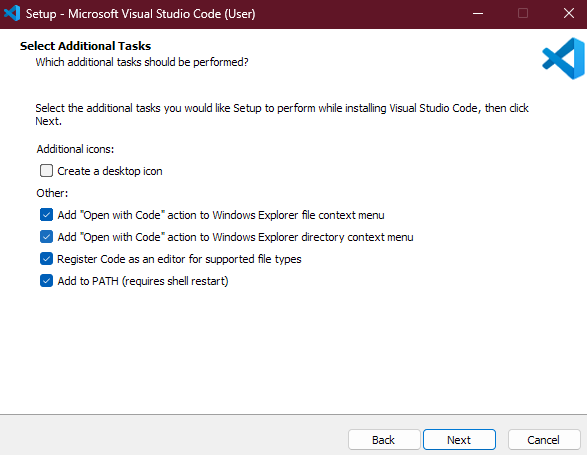
VS Code Installation
Important: Next, we need to install an extension that will help us preview our website before we publish it online. This preview is essential for testing and making changes during development.
-
Open the Extensions View: In VS Code, click the Extensions icon in the Activity Bar on the left side of the screen (or press
Ctrl+Shift+X).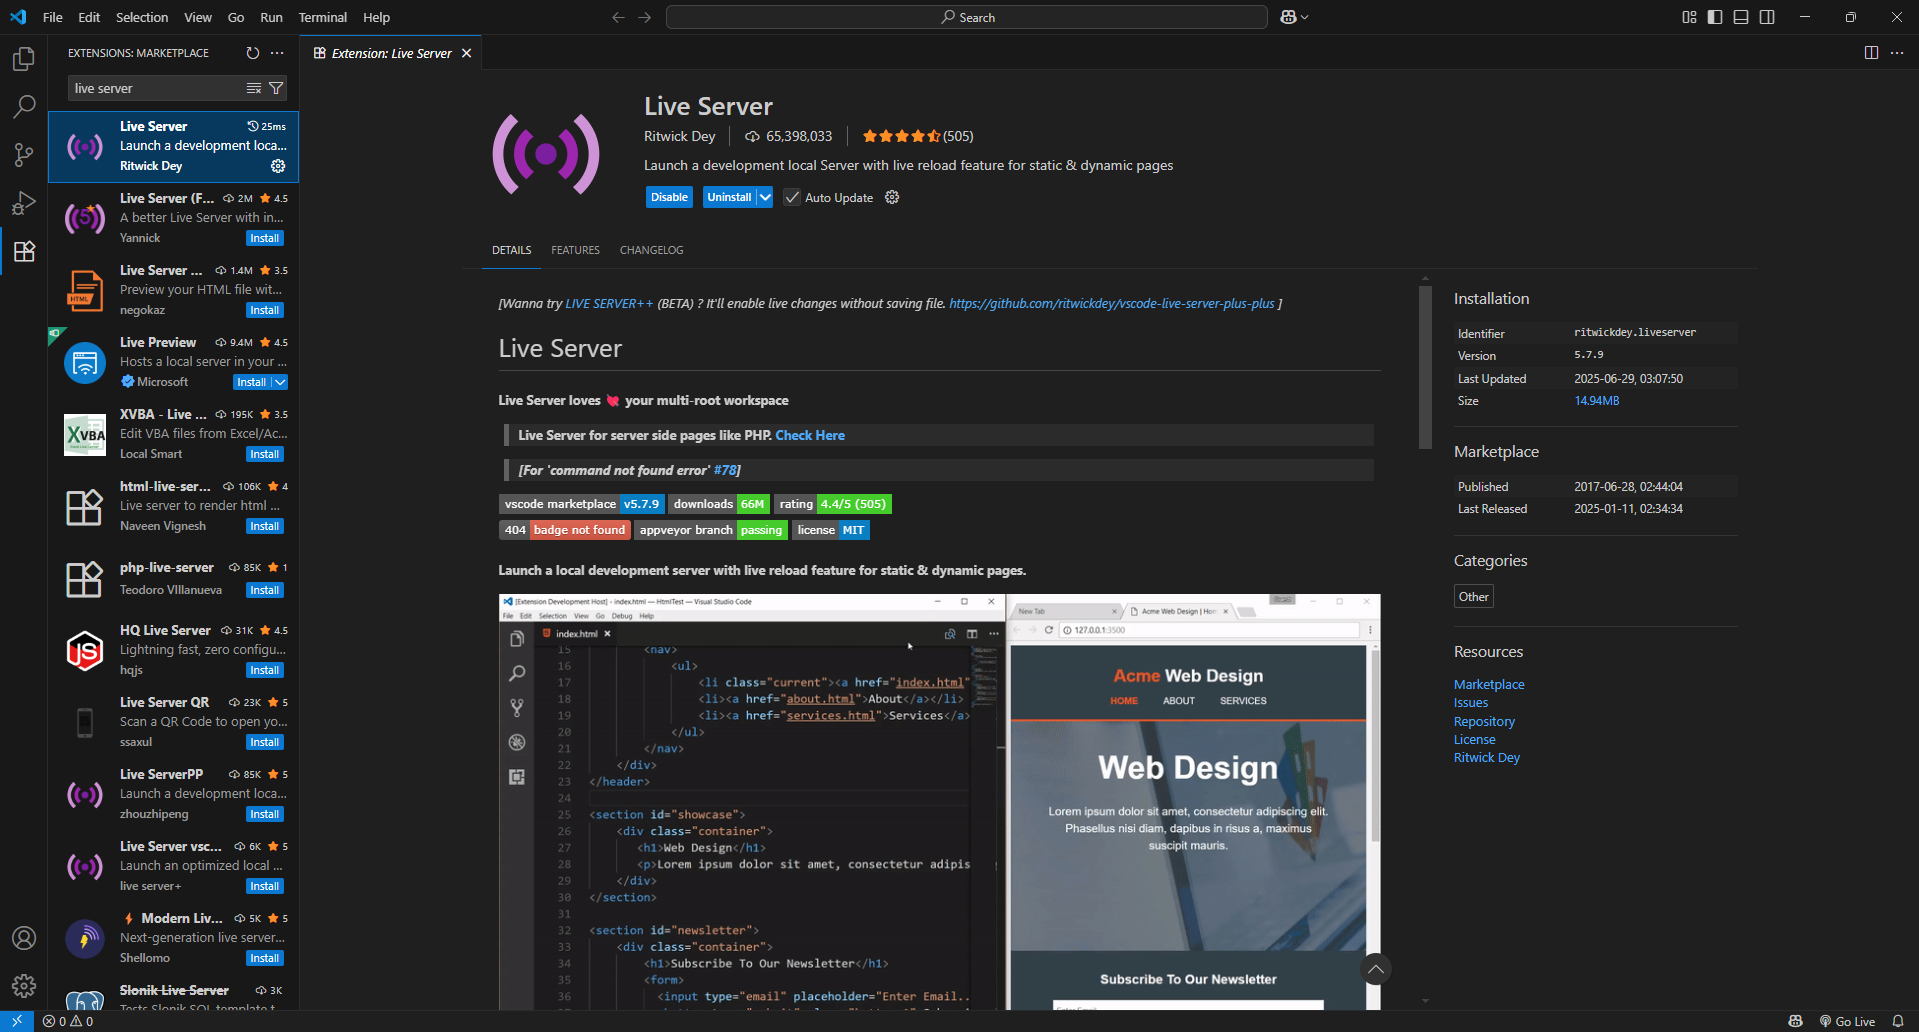
Live Server Installation -
Search for Live Server: In the search bar that appears, type
Live Server. -
Install the Extension: The top result should be "Live Server" by Ritwick Dey. Click the blue Install button next to it.
Step 2: Set Up Your Project and Understand its Structure
With the tools installed, let's create a home for your portfolio and understand how the pieces fit together.
-
Create a Project Folder: On your Desktop or in your Documents, create a new folder and name it
my-portfolio. -
Open in VS Code: Right-click on your new
my-portfoliofolder and select Open with Code. -
Create Your Core Files: Inside VS Code, click the "New File" icon to create three empty files:
index.html,style.css, andscript.js.Local project setup
The Anatomy of Your Website: Skeleton, Outfit, and Brains
So what are these three files for? Every website you've ever visited uses this exact combination.
index.html- The RCC Frame and Brickwork: This is the basic structure. It's the concrete pillars and beams that lay out the plan, defining where the rooms are. It also includes the red brick walls that fill the frame. You have a solid house structure, but it’s just rough cement and bricks. It’s not ready to live in.style.css- The Plaster, Paint, and Finishing: This is all the finishing work that makes the house look good. It's the smooth layer of plaster over the rough brick walls, the putty, and the final coat of paint you chose from the catalog. It's the shiny vitrified tiles on the floor and the design of the wooden doors and windows. This part is purely about the look and feel.script.js- The Electrical Wiring and Plumbing: This is what makes the house actually work. It's the hidden wiring in the walls that connects the switch to the fan and the lights. When you flip a switch, JavaScript is the "current" that makes the fan actually spin. It's the plumbing that makes water flow when you open a tap and the wiring that makes the doorbell ring when someone presses the button. It handles all the action and interactivity.
A Typical Portfolio Page Layout
When we prompt our AI in our upcoming article, we'll ask it to build a structure inside index.html that includes these common sections:
- Header & Navigation: At the very top, with your name and links.
- Hero Section: A big, bold introduction.
- Projects Section: The heart of your portfolio, showcasing your work.
- Contact Section: A simple form or links to your social profiles.
- Footer: The very bottom of the page with copyright info.
Now you don't just have empty files; you have a blueprint!
Step 3: Now for the Magic Trick - The Live Server
Test the Workflow: Let's try out our new setup!
- Go back to your
index.htmlfile and typeHello World!into it and save (Ctrl+S). - Now, look at the bottom-right corner of your VS Code window. You should see a "Go Live" button in the blue status bar. Click it.
3. Your default web browser will automatically open, displaying your "Hello World!" page.
4. Go back to index.html in VS Code, change the text, and save the file. Watch your browser refresh instantly!
This edit-and-save loop is the exact workflow we will use in our upcoming articles. To stop the server, simply click the port number button (e.g., "Port: 5500") in the status bar.
Okay, Tools Down!
Take a second and look at what you’ve done. You've set up a professional-grade cloud account, enabled top-tier security, activated an AI assistant, and configured a local development environment with a live-reloading server. Seriously, that’s a huge step.
You now have a complete, professional workshop. All the prep work is done.
In the next part, we'll finally step into the cloud and teach AWS how to listen for requests from your domain name. It's time to connect the dots.
This article is part of the series: Building a Portfolio Website From Scratch
About the Author
This article was written by Ashay Taksande.