The Pro Upgrade for your static website with CloudFront and HTTPS 🔒
Published on: August 21, 2025
Welcome back to the "Portfolio from Scratch" series! In the last guide, we got our static site up and running on Amazon S3. That’s a huge step, but now it's time to make it ready for the real world. In this post, we're going to give our site a serious, professional level upgrade.
We'll make it way faster with a Content Delivery Network, secure it with HTTPS so we get that cool little padlock in the address bar, and finally, point our domain name to this new, powerful setup.
Let's get to it!
Step 1: Get an SSL Certificate
This is what gives us the padlock icon and enables HTTPS, proving our site is authentic and encrypting traffic for our visitors. We'll use AWS Certificate Manager (ACM) to get a free, auto-renewing certificate.
Step 2: Set Up CloudFront
Amazon's Cloudfront Content Delivery Network (CDN) makes our site load faster for people around the world. It acts like a global franchise, delivering our site's content from a location closest to the visitor.
Step 3: Point Our Domain
The final step is to update our DNS records in Route 53, telling the internet to send all visitors to our new, speedy, and secure CloudFront distribution.
And most importantly, get www.yourpersonaldomain.com live!
First, What's an SSL/TLS Certificate Anyway?
We all know that little padlock icon (🔒) we see next to a URL, right? That's thanks to an SSL/TLS certificate. Without it, sending information to our website is like sending a postcard; anyone who intercepts it along the way can read it. An SSL certificate acts like a tamper-proof, sealed envelope for our site's traffic.
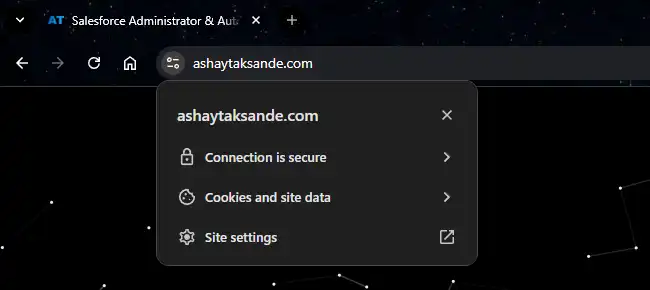
It proves our site is who it says it is (authentication) and scrambles the data (encryption), so only the right person can open it. This is what puts the 'S' in HTTPS and builds trust with our visitors. Browsers will even flag sites without it as "Not Secure," which is something we definitely want to avoid.
Step 1: Grab Our Free SSL Certificate
We'll use AWS Certificate Manager (ACM) to snag a free certificate that even renews itself. Pretty neat, right?
- Let's head over to the
AWS Certificate Manager (ACM)console. - Super important: We need to make sure we switch our region to
US East (N. Virginia) us-east-1. CloudFront is a bit picky and requires the certificate to be in this specific region. - Click on Request a certificate and choose Request a public certificate.
- In the "Domain names" box, let's add our main domain (like
yourpersonaldomain.com) then, click on Add another name to this certificate and add a wildcard version (*.yourpersonaldomain.com). The wildcard is great because it covers subdomains likewww. - For validation method let's stick with DNS validation. Since we're using Route 53, it’s by far the easiest way.
- For Key algorithm, select
RSA 2048for maximum compatibility, unless you have a specific requirement for the performance gains of ECDSA. - Click Request.
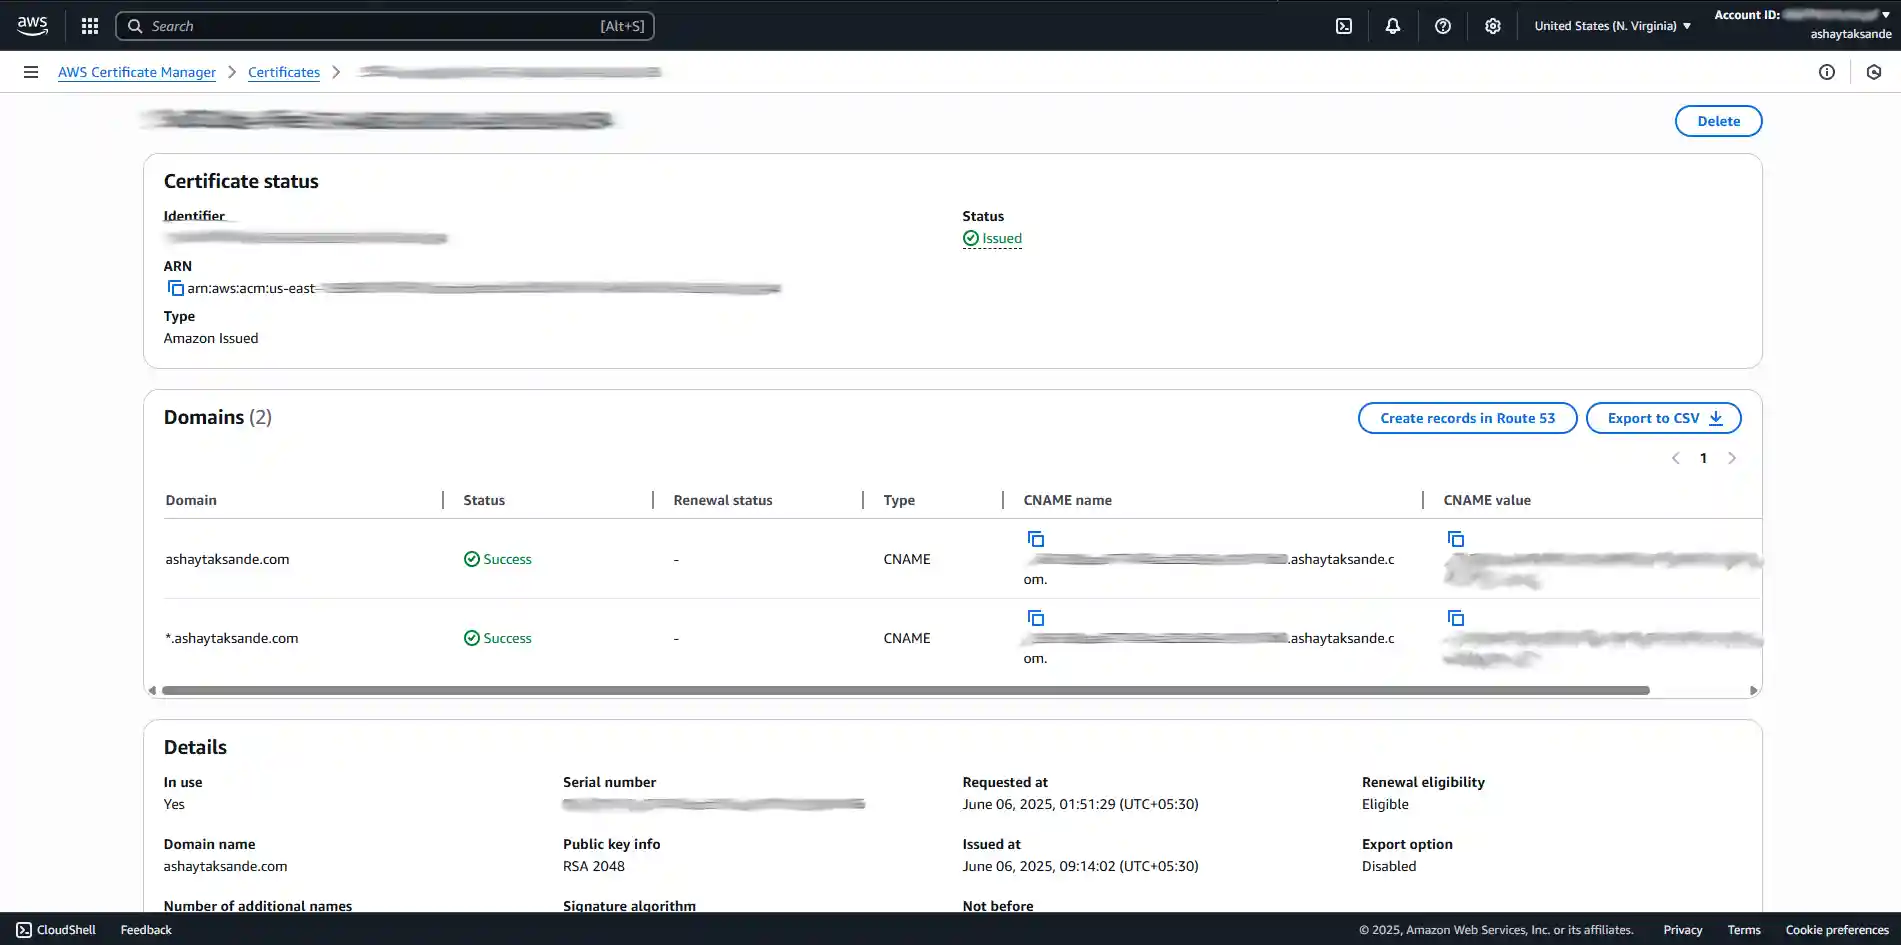
- On the next screen, we'll see our request is "Pending." We'll just expand the details and click the
Create records in Route 53button. AWS will do the magic of adding the validation records for us. - After a few minutes, we should see the status flip from "Pending" to "Issued".
So, What's This CloudFront Thing?
Amazon CloudFront is a Content Delivery Network (CDN), which is a fancy way of saying it makes our site load faster for people around the world.
Hosting our site on S3 alone is like running a single, amazing pizza place in your city. If someone from London wants our pizza, they have to wait for a very long-distance delivery, and it’ll be slow. CloudFront turns that single restaurant into a global franchise. It stores copies of our website in "kitchens" all over the world, like in London, New York, and Tokyo. When a customer in London visits our site, the local branch delivers it instantly. The result is a much faster, better experience for everyone, no matter where they are.
Step 2: Set Up Our CloudFront Distribution
Alright, certificate in hand, let's get CloudFront running. This process involves reconfiguring our S3 bucket to be private and then pointing CloudFront to it.
Part A: Prepare Our S3 Bucket
Before we even touch CloudFront, we need to change our S3 bucket's role from a public web server to a private storage locker.
- First, let's head over to the S3 bucket we created in the last guide.
- Go to the Properties tab, find the "Static website hosting" section, click Edit, and choose Disable. Why? CloudFront will now be our web server, so S3 no longer needs this public-facing feature.

Part B: Create the CloudFront Distribution
Now we'll create the distribution itself!
- Let's go to the Amazon CloudFront console and click the orange Create a CloudFront distribution button.
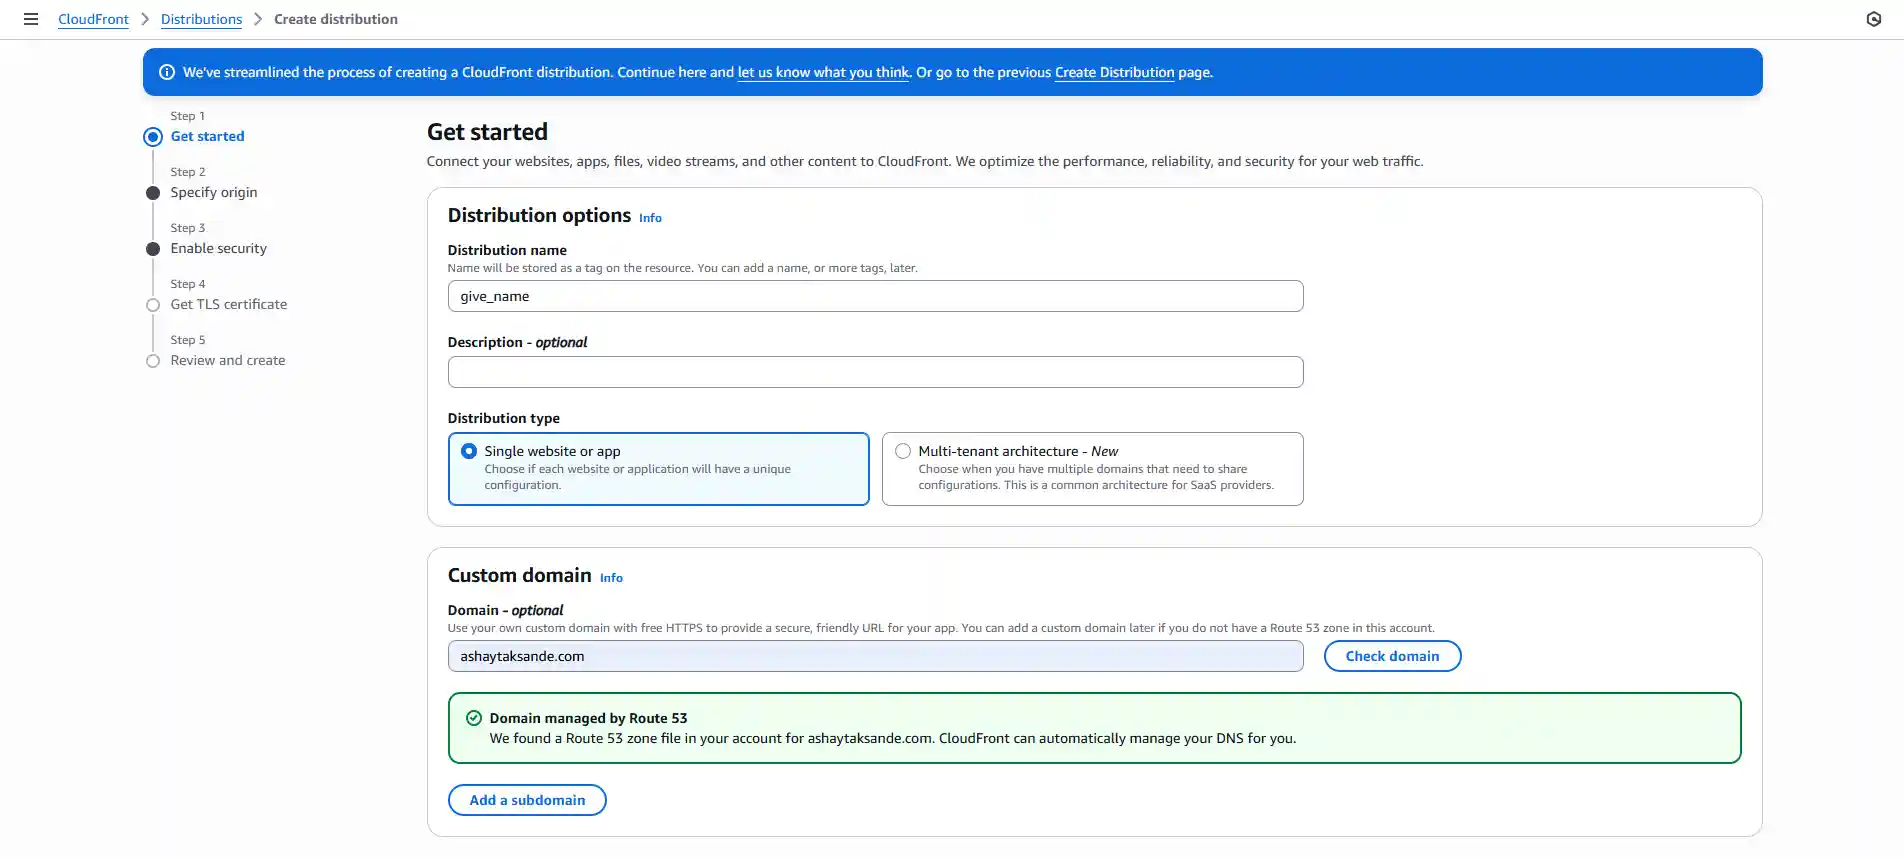
- Get Started: Give your distribution a descriptive name. For "Distribution type," select
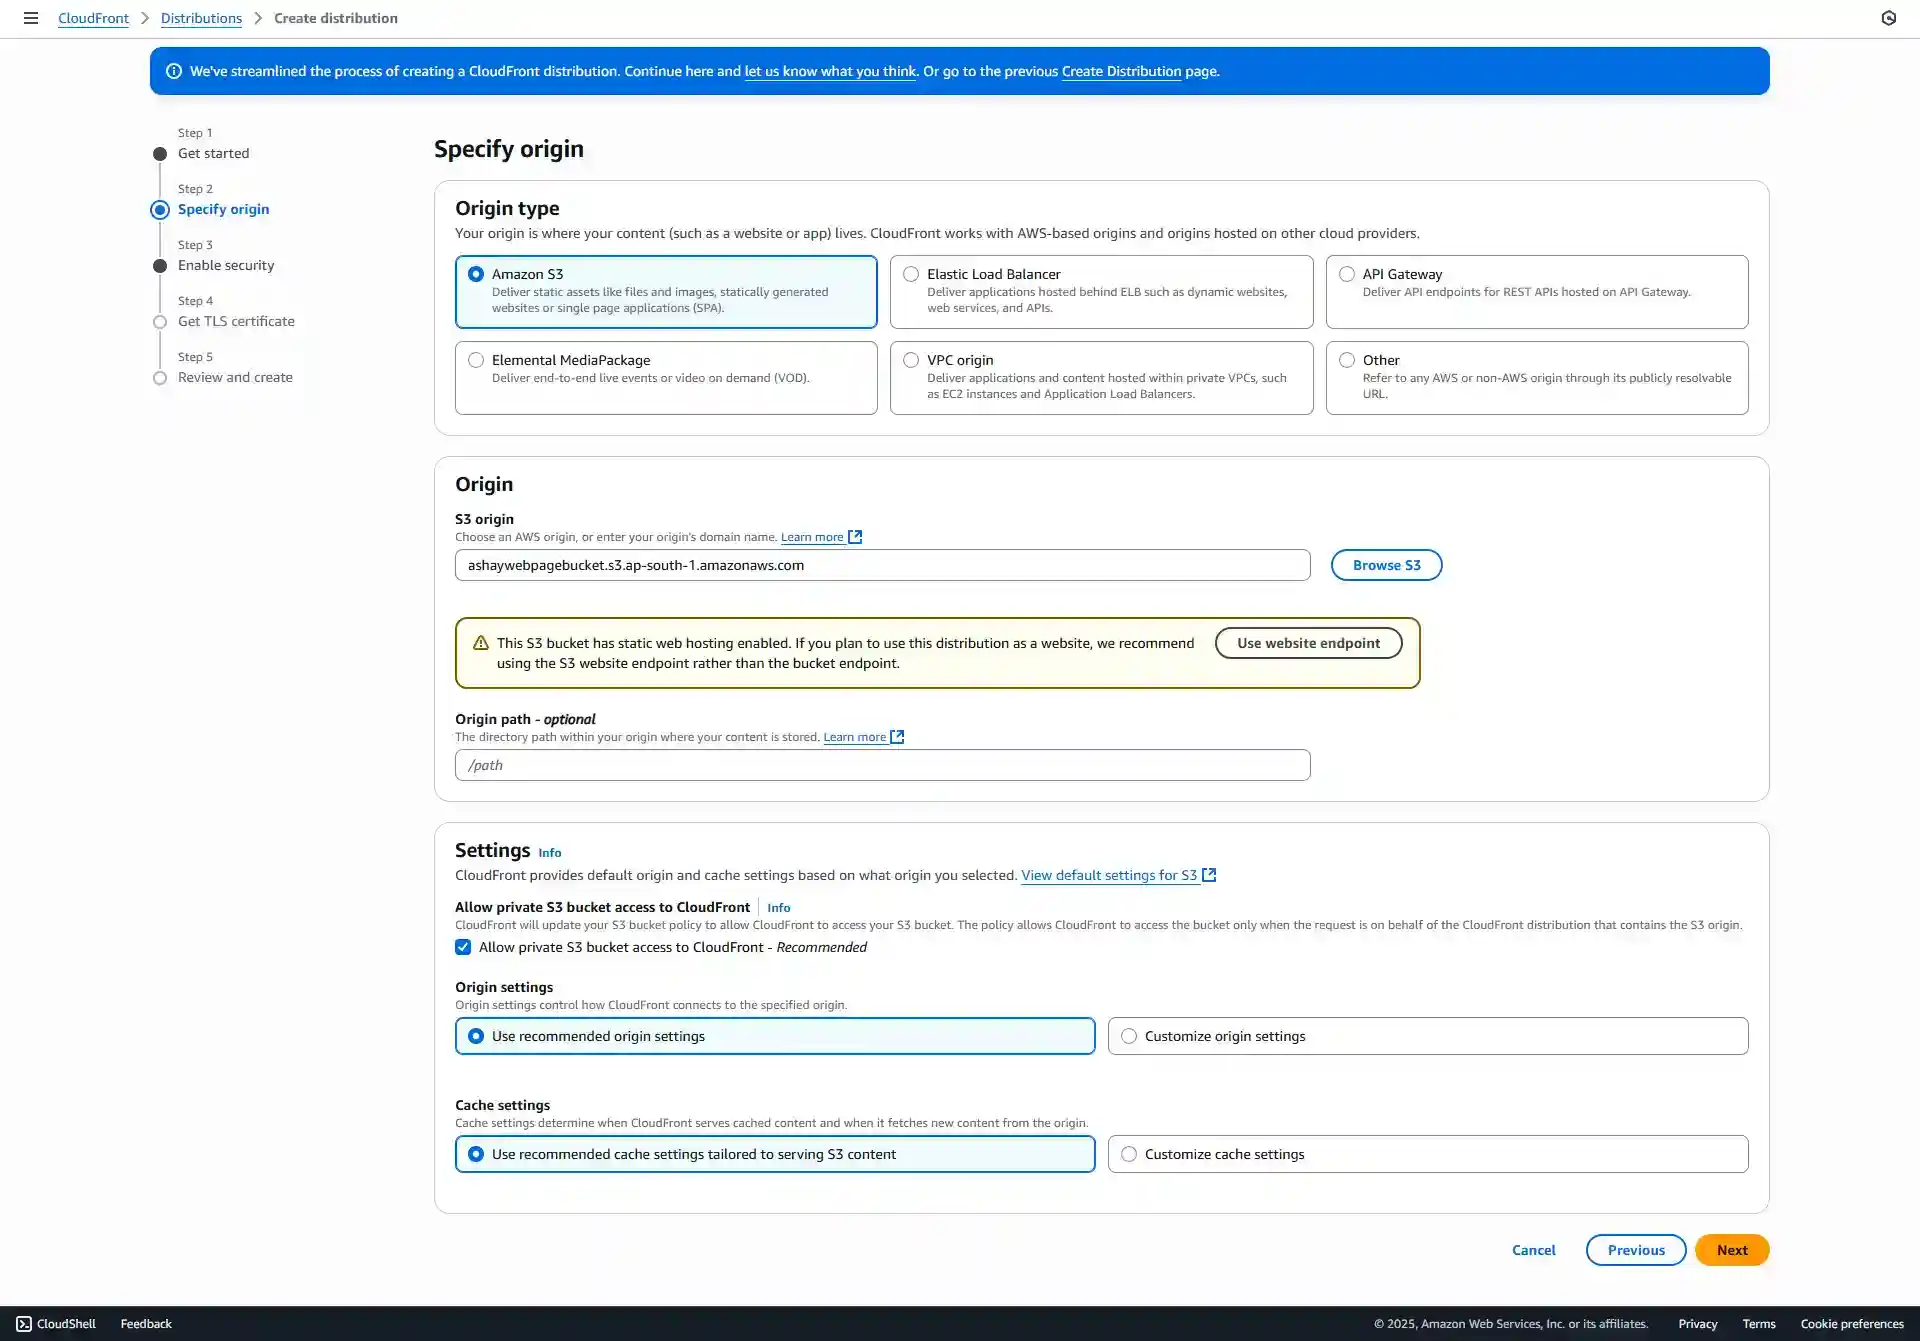
Single website or app. In the "Custom domain" field, enter your domain name. Since we've already set up Route 53, AWS will recognize it instantly. - Specify Origin: For "Origin type," choose S3. In the "Origin endpoint" field, select our S3 bucket from the dropdown list.
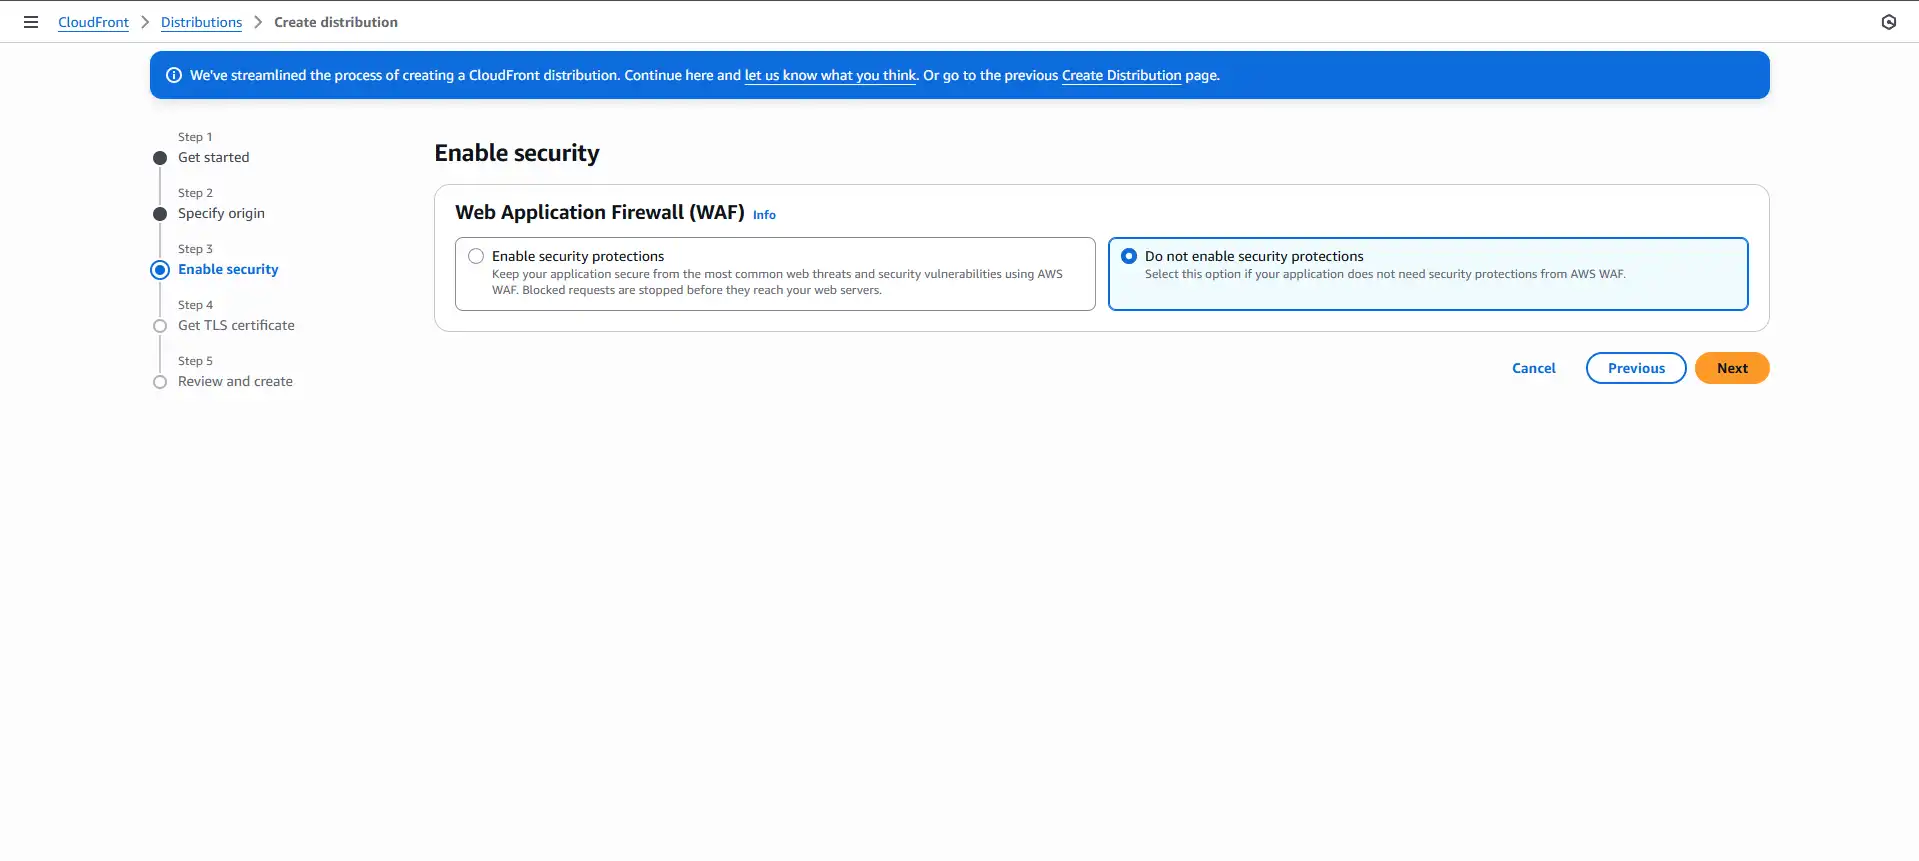
- Enable Security: Select Do not enable security protections❌.
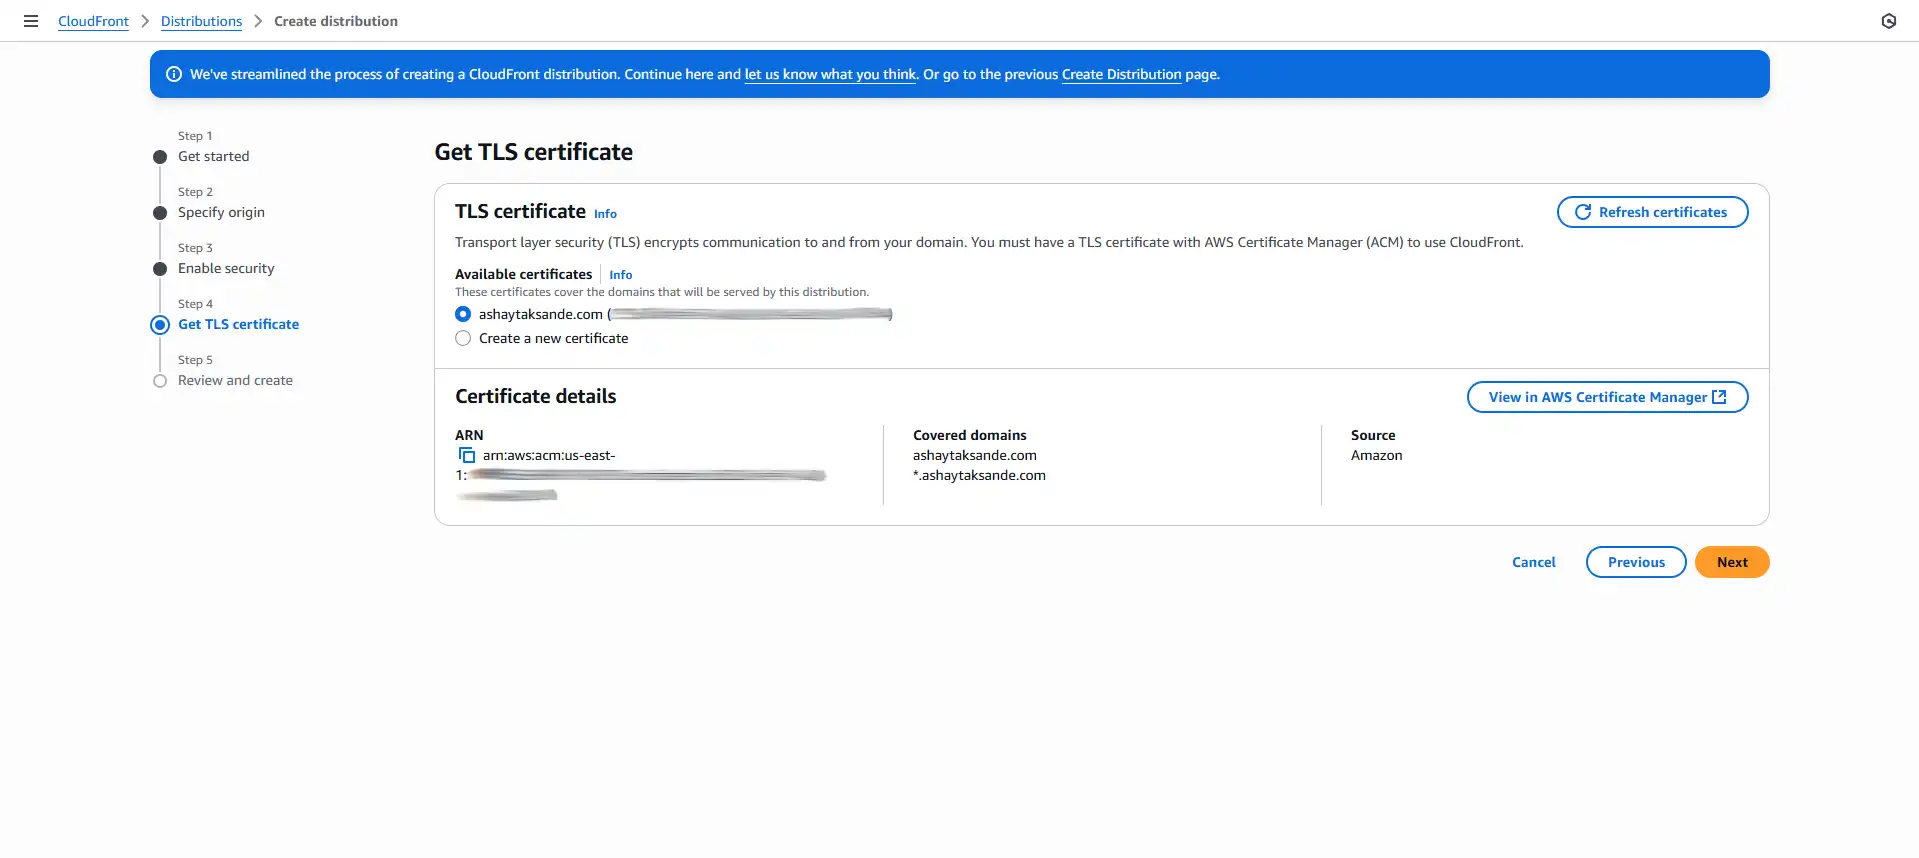
Why? The Web Application Firewall (WAF) is a powerful (and paid) security service that protects against complex attacks like SQL injection. For our simple static portfolio, it's overkill. We can always enable it later if needed. - Select the certificate that we had created earlier.
- Review and Create: Check your settings one last time and click Create distribution.
Part C: Secure the Origin & Verify Redirect
After the distribution is created, we'll perform the most important security steps: locking down our S3 bucket and ensuring all traffic uses HTTPS.
- Once the distribution is created (this can take a few minutes), open it from the CloudFront console.
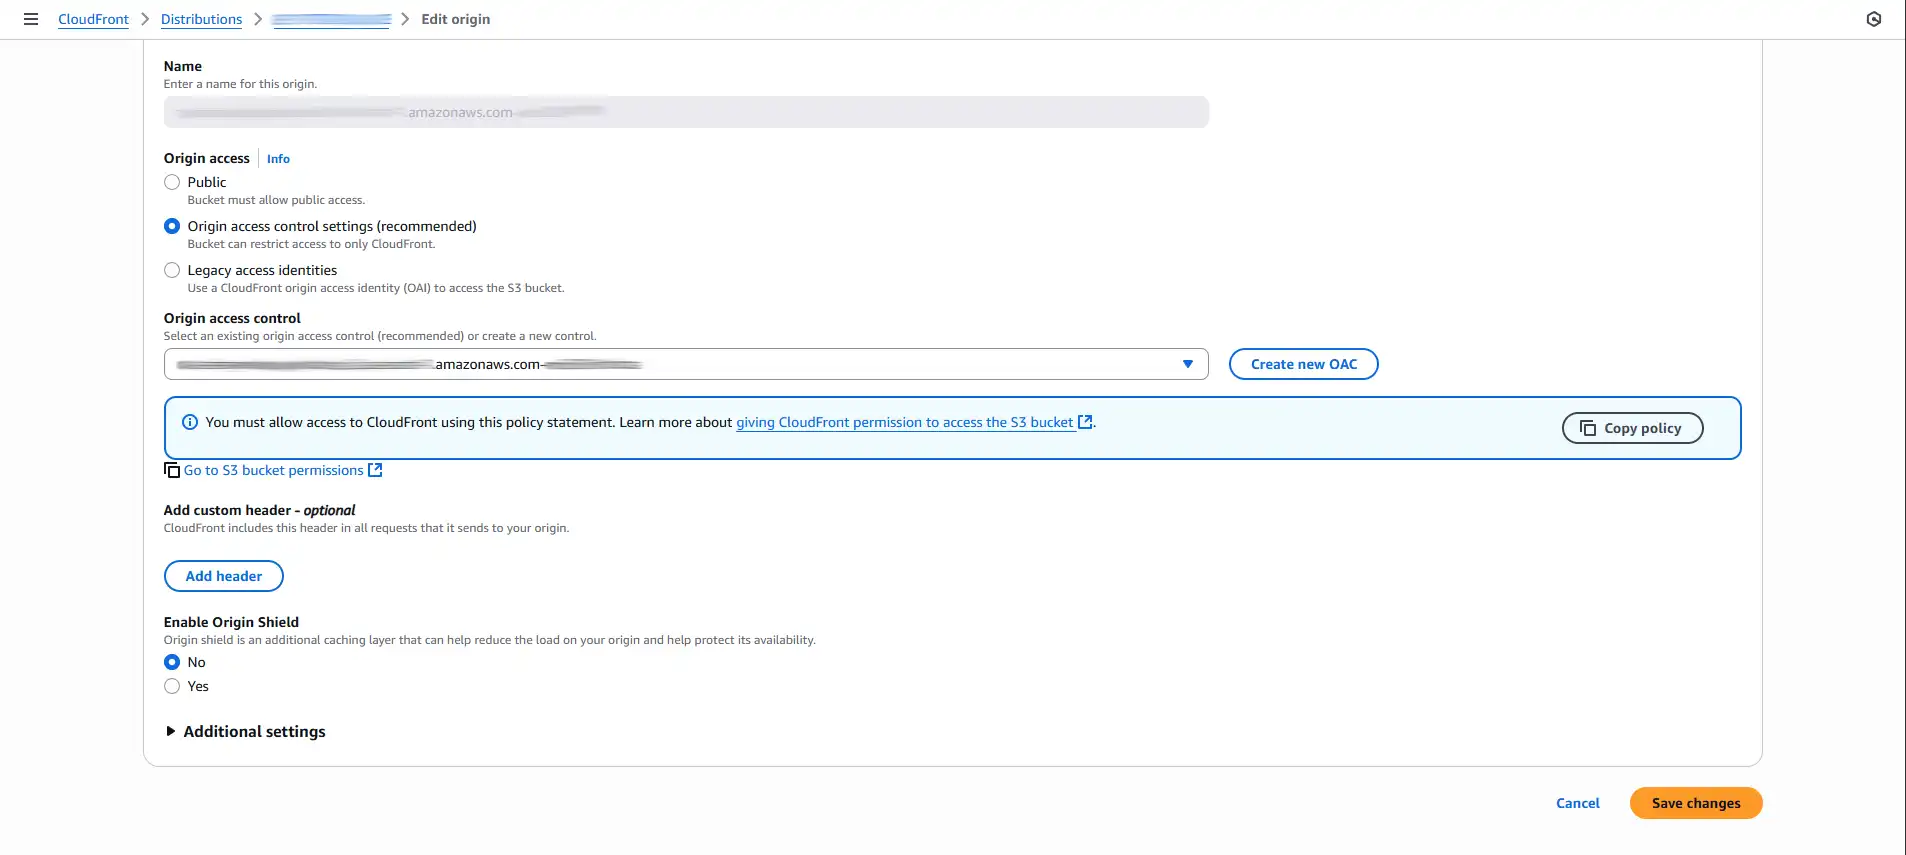
- Go to the
Originstab, select the S3 origin from the list, and click Edit. - Find the Origin access section and select
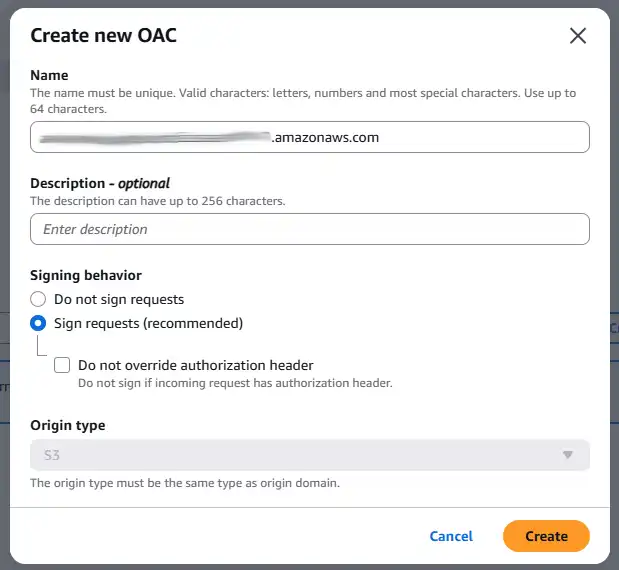
Origin access control settings (recommended). - A new Origin access controlsection will appear. Click the blue
Create new OACbutton, accept the default options, and click Create. - You'll now see a banner with a policy. Click the
Copy policybutton. - Click the
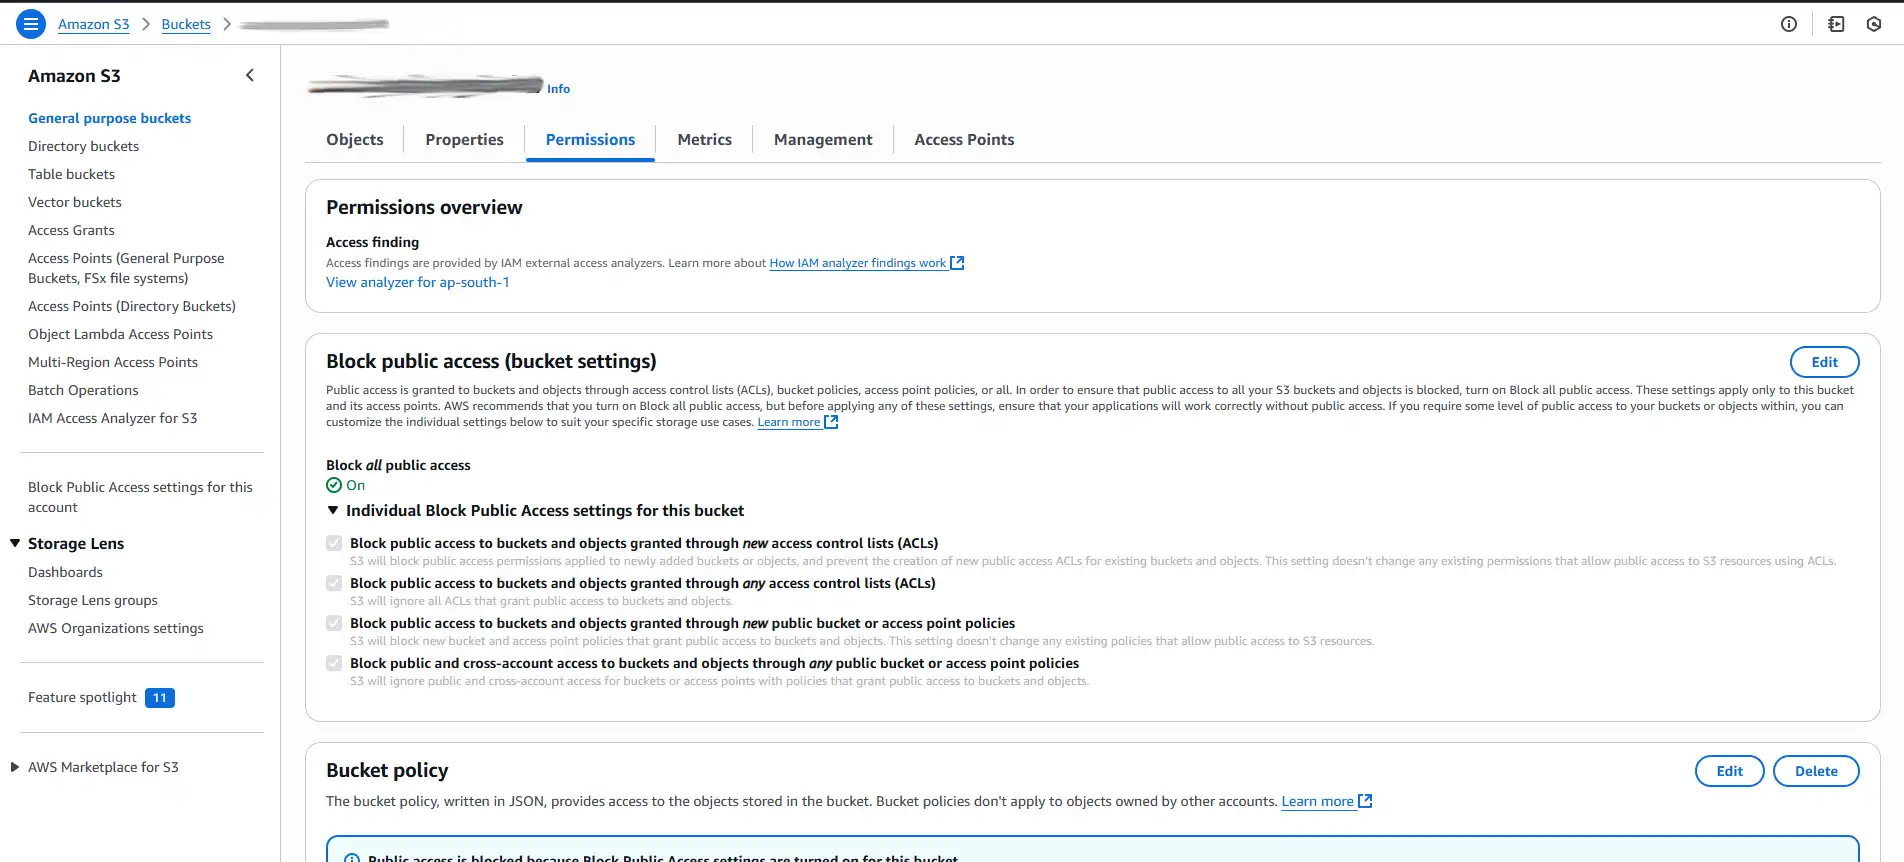
Go to S3 bucket permissionsbutton. This will take you directly to the Permissions tab in S3. - In the S3 bucket's
Permissionstab:- First, under Block public access, click Edit and check ✅ the box for
Block all public access. Save the changes. - Next, under
Bucket policy, click Edit. Delete the old public policy and paste the new one we just copied from CloudFront. Save the changes.
- First, under Block public access, click Edit and check ✅ the box for
                           Policy template
{
    "Version": "2012-10-17",
    "Statement": [
        {
            "Sid": "AllowCloudFrontServicePrincipal",
            "Effect": "Allow",
            "Principal": {
                "Service": "cloudfront.amazonaws.com"
            },
            "Action": "s3:GetObject",
            "Resource": "arn:aws:s3:::yourBucketName/*",
            "Condition": {
                "StringEquals": {
                    "AWS:SourceArn": "yourCloudfrontARN"
                }
            }
        }
    ]
}
yourBucketNameandyourCloudfrontARNare placeholders that you need to replace.
Why? These two actions completely lock down our S3 bucket. It's now private, and the only entity in the world that has permission to read its files is our new CloudFront distribution. This is the best practice for security.
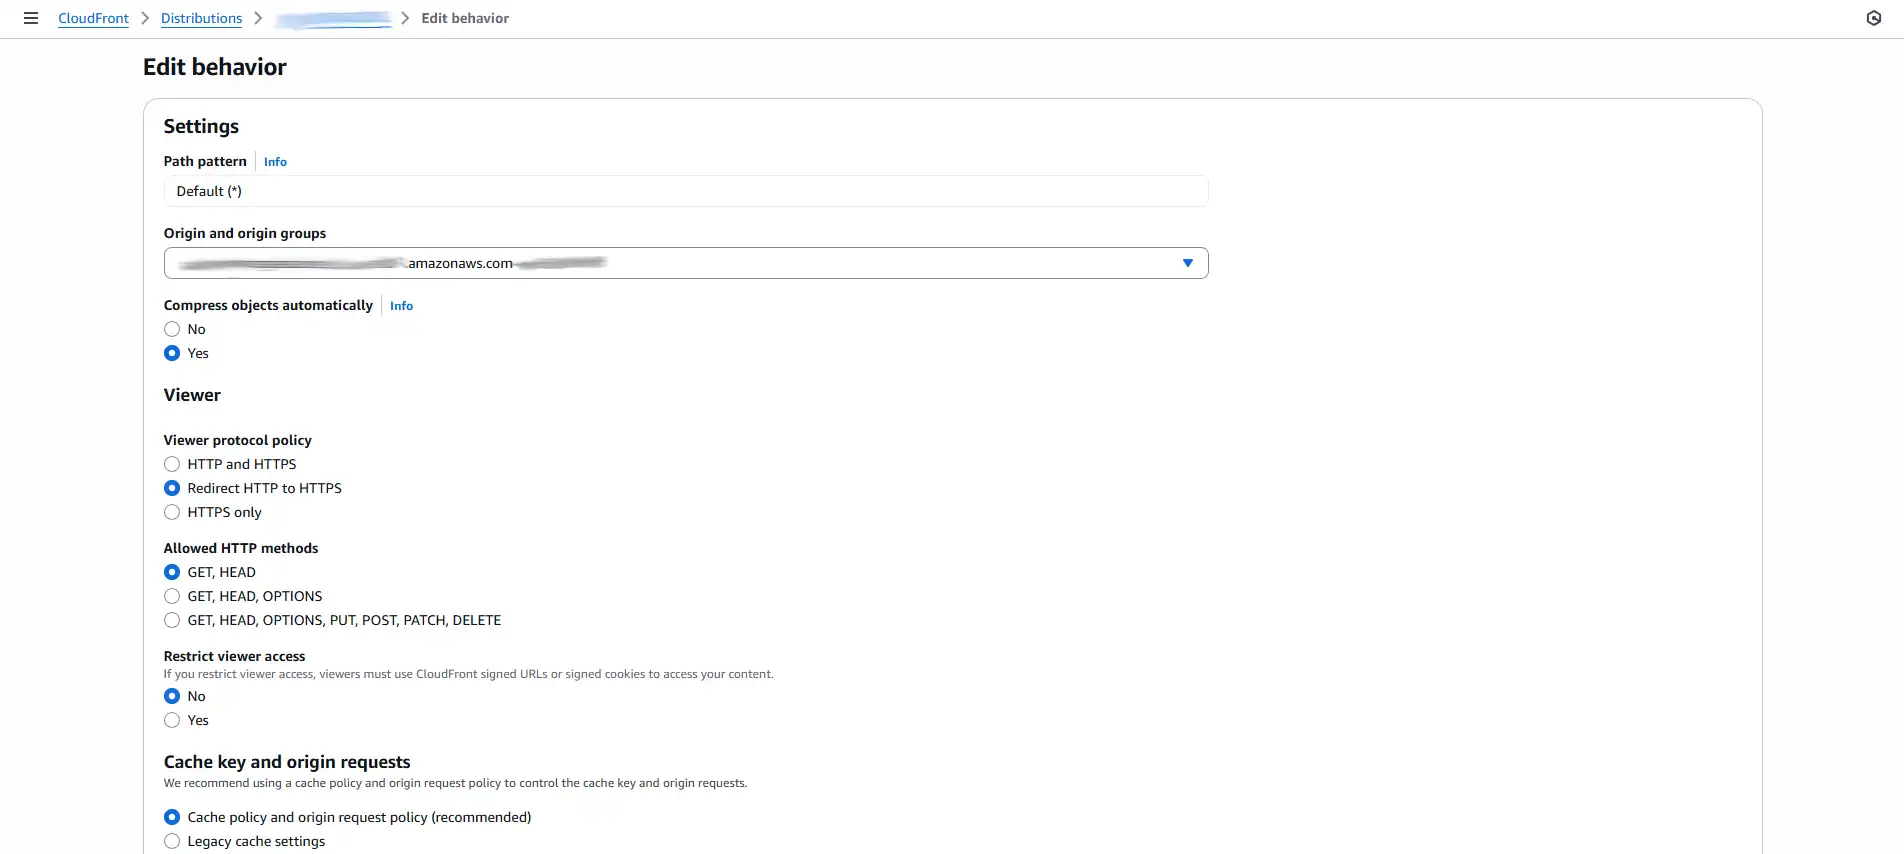
- Finally, let's verify the HTTPS redirect. In CloudFront, go to the
Behaviorstab, select the default behavior, and click Edit. Scroll down and ensure Viewer protocol policy is set toRedirect HTTP to HTTPS.

Step 3: Point Our Domain to CloudFront (The Easy Way)
Now we need to tell the internet to send visitors that visit www.yourpersonaldomain.com to our new, speedy CloudFront distribution. Thanks to a new AWS feature, this is now a one-click process!
You must be wondering, how is this different from changing NS records?
That's a great question. Let's stick with the food delivery analogy, but add a twist.
Changing our NS records earlier was like moving from India to the USA. In India, we always used Swiggy, but in the USA, Uber Eats is our go-to app. The first thing we did was tell all our friends and family, "We've moved! We're not using Swiggy anymore. From now on, if you want to send us food, use Uber Eats." We switched the entire service we use for deliveries from Swiggy (original website registrar) to Uber Eats (AWS Route 53).
What we're doing now is the second, crucial part of the move. We're opening the Uber Eats app and adding our new address to our new permanent apartment. We're creating the specific, final direction that tells the delivery driver exactly where to bring the food (our CloudFront distribution). We're giving the final instructions to the new service we've already put in charge.
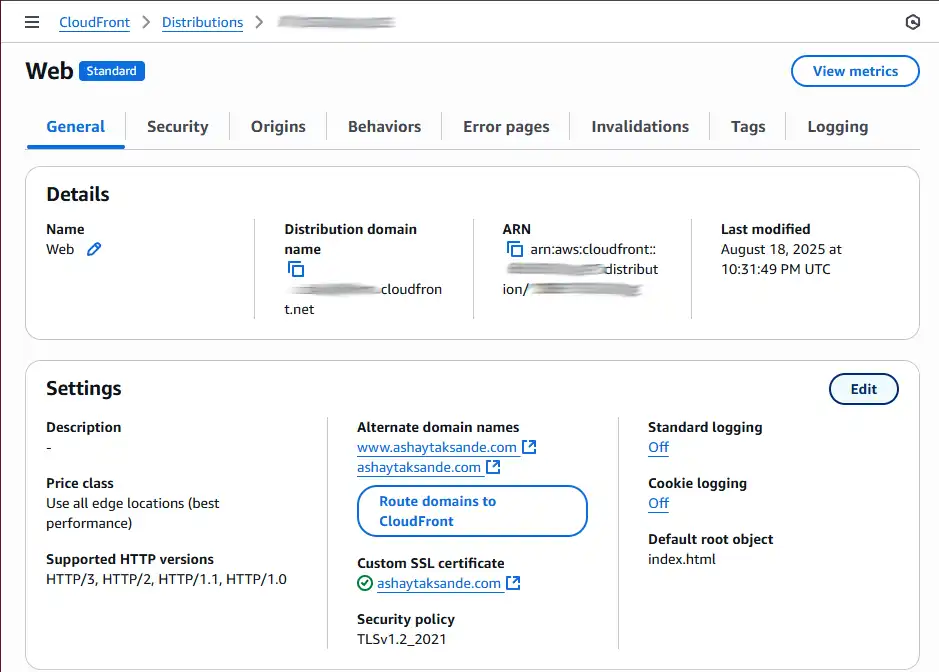
- Once your distribution's status is "Enabled," go to its main page in the CloudFront console.
- In the Settings section, you'll see your alternate domain names listed (e.g.,
yourpersonaldomain.com and www.yourpersonaldomain.com). - Click the blue
Route domains to CloudFrontbutton. - A dialog will pop up. It will show the 'A' and 'AAAA' records it's about to create in Route 53 for you. Simply click
Set up routing automatically. - And that's it! AWS will automatically create the necessary alias records in Route 53, pointing both your root domain and www subdomain to your CloudFront distribution.
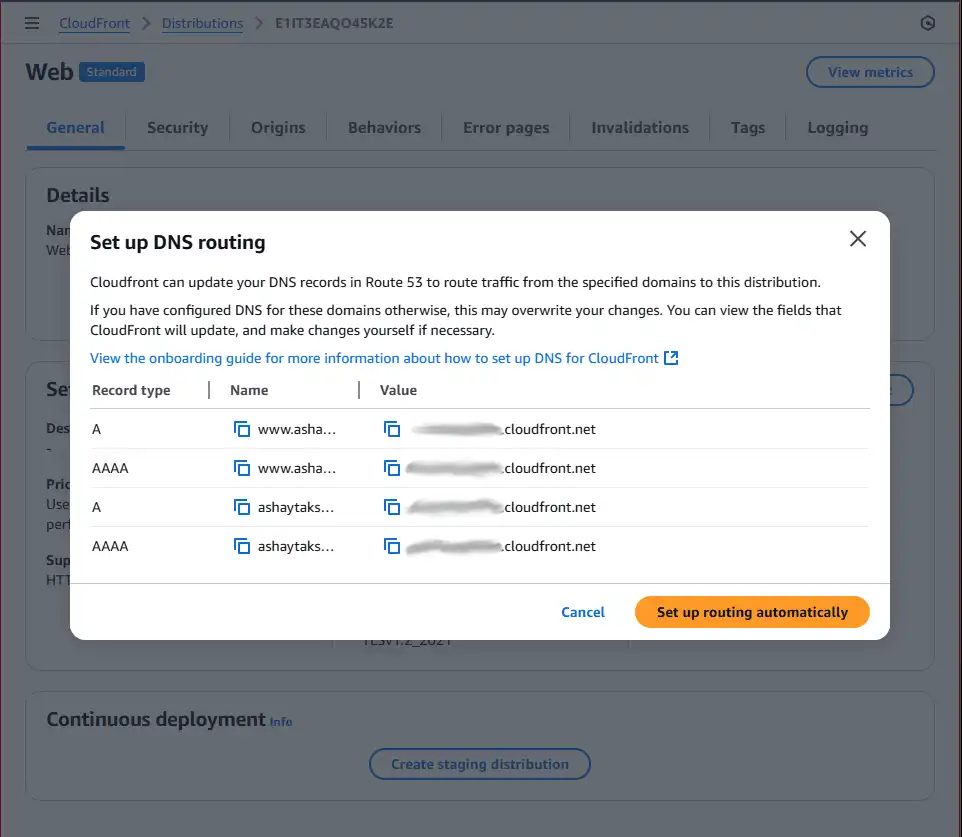
This single action replaces the entire manual process of creating records in Route 53, making our setup faster and less error-prone.
And... That's a Wrap!
We did it! 🎉 We now have a super-fast and secure static website.
We can test that every thing is working by visiting our website https://www.yourpersonaldomain.com and see that beautiful secure lock.
The next most important step is to go ahead and have a small celebration🥳🥳🥳🎉🎉🎉, we've earned it!🥳🥳🥳🥳🥳
We've now built a professional-grade foundation for our website. In the next part, we’ll explore how to build on that foundation more effectively using an AI assistant. We'll dive into the art of the prompt, learning how to generate better code and turn your ideas into a practical solution.
This article is part of the series: Building a Portfolio Website From Scratch
About the Author
This article was written by Ashay Taksande.